Eventbrite
A well-recognised ticketing system for paid-for ticketed events, charging a fee for each ticket sale. There is also a free option for free events.
Reasons to use Eventbrite could be:
- you want to charge for tickets to your event (Eventbrite will do all the payment processing securely)
- you want to invite non-XR people to your event (and therefore don't want to use XR's Action Network email list)
You can set up email responses and pre-event reminder emails with info for ticket holders and also set limits to numbers of tickets at different prices.
- Creating your event: first steps and basic info page
- Creating your event: Main Details Page
- Creating your event: Tickets, Payouts and Refunds
- Creating your event: Order Confirmation and Order From
- Creating your event: Publishing and finding your event in your Eventbrite account
- How to send an update email and how to access your attendee list
Creating your event: first steps and basic info page
You can create an Eventbrite account by following this link www.eventbrite.co.uk and clicking sign up in the top right corner.
You will then be asked to enter an email, name and password. We recommend you use an XR email address. We recommend that you do not use a personal Eventbrite account to create events for XR.
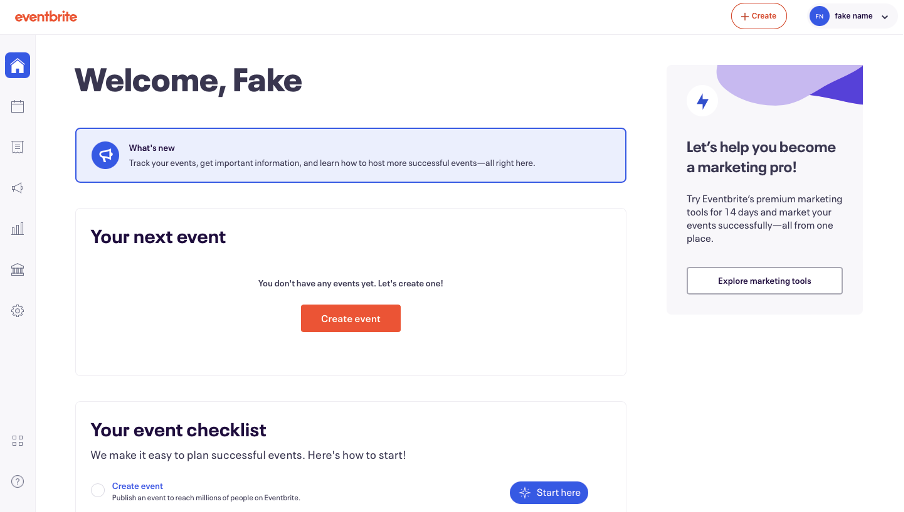
Once you have made your account, you will be able to create an event: click the button ‘Create an event’ that is now on Eventbrite’s top bar.

If this is the first time you made an event, it will ask you several questions about how you will use the website. This will help set up the tools that Eventbrite has.
You will be then taken to this page, where you can click the orange ‘create event’ button that is now in the middle of the screen and the top bar.
Editing the event - Basic info page
From here, you will then land on this basic info page. This is a scrollable page, scroll down to see the three main sections, which are Basic Info, Location, Date and Time.
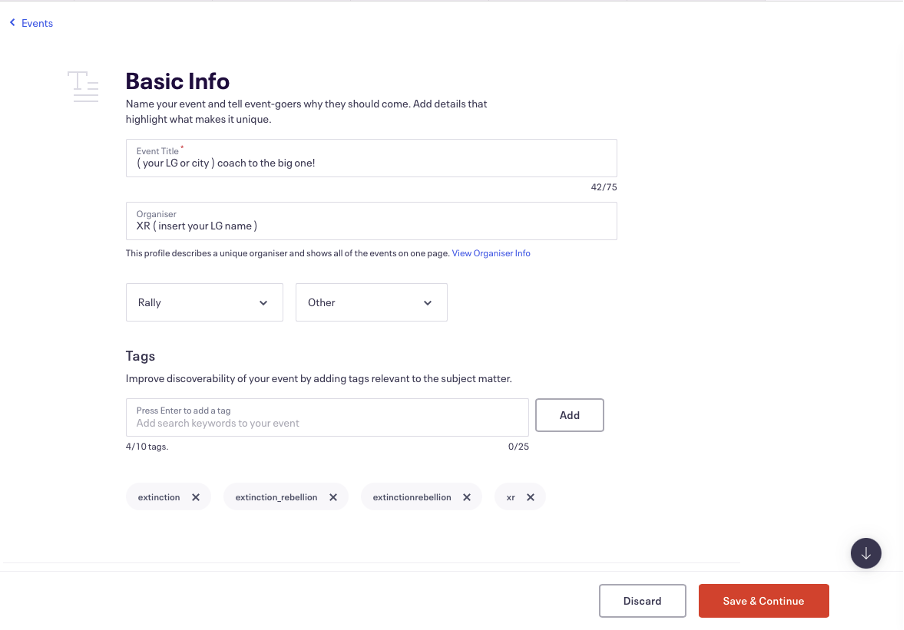
Add an ‘Event Title’.
You then need to add the organiser’s name. This could be your Local or Regional/National/Commmunity group name, such as XR Midlands. Don’t put your real name down for security reasons!
You will then need to decide what type of event it is in the drop box, in our example above, we have chosen 'rally'.
You then should add some tags: this helps people find the event when they are searching on eventbrite. Examples you could use are, Extinctionrebellion, XR, Extinction_rebellion, climateactivism. You can choose up to 10 tags.
Location

Now scroll down to the 'Location' section to add the address/location of your event. If your event is online you can select online as an option. If you do not know the address yet or it is still to be agreed click ‘to be announced’, as you can always edit this later.
Date and Time
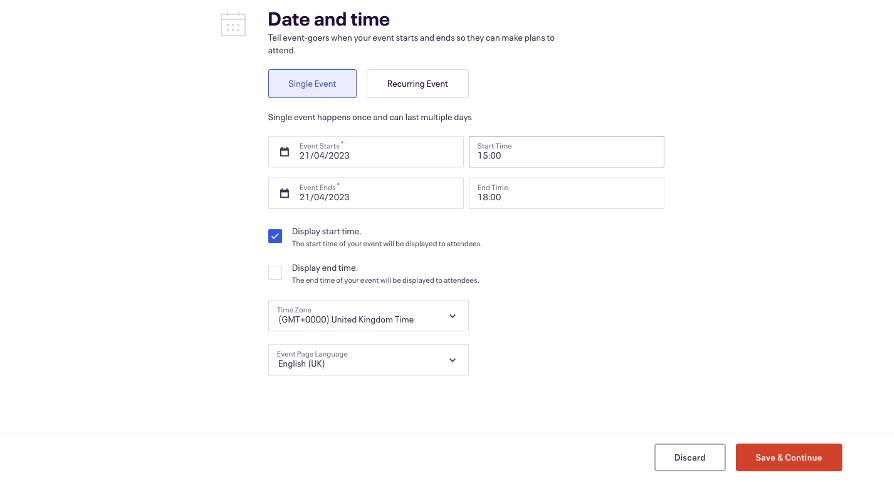
Scroll down again to the Date and Time section and specific when the event is, and if it is a reccuring event. You can also choose if you display and start and end time when it is a live published event.
Once you have filled in the above details, click 'Save & Continue' to save your work. This does not publish the event. It just saves it.
You will then be sent to the main page to manage your event. This page has 4 main sections: Basic Info, Detials, Tickets, Publish. These sections can be found on the left sidebar.
Eventbrite has a very useful and extensive support section on their website as well as prompts all the way through the process.
The rest of this guide covers a more simple step-by-step approach to the main features of Eventbrite for ease of use.
Please note that Eventbrite sometimes changes its policies or costs. We will do our best to keep this guide updated, correct, and relevant.
Creating your event: Main Details Page
Once you have followed the instructions on the previous page, you will be taken to this page, where you will be asked to go into more detail. This information will make up the main page people see when they click on the link to your event.

Main Event Image
First you can add a picture. This picture should be attention-grabbing but also informative. You can use https://extinctionrebellion.aktivisda.earth/en to make a good graphic. Once you have a graphic you can upload it by clicking ‘upload image’.
Summary
In the summary, you should include key but short details about the event, as you only have 140 characters.
Description

In the description you can give more details and go into more depth. You can include information about your event, locations, timings and also why people should come!
Include information about your refund policy (see later sections) and an email so people can contact you for questions about the event .
You could add more images or videos if desired.
Once finished click save.
Creating your event: Tickets, Payouts and Refunds
New costs since 2023s Big One
Since the big one, Eventbrite has since added new costs for paid-for events. These are for each event, so if you have two events, you will have two fixed fees to pay.
26-100 tickets have a fee of £7.99 per event (probably affecting bookings for 1 large coach).
101-250 tickets have a fee of £19.99 per event (probably affecting bookings for 2+ large coaches).
Ulimtied tickets- £34.99 per event.
This is in addition to the per-ticket processing fees, which are still charged as a percentage of each ticket.
See More information about the changes here.
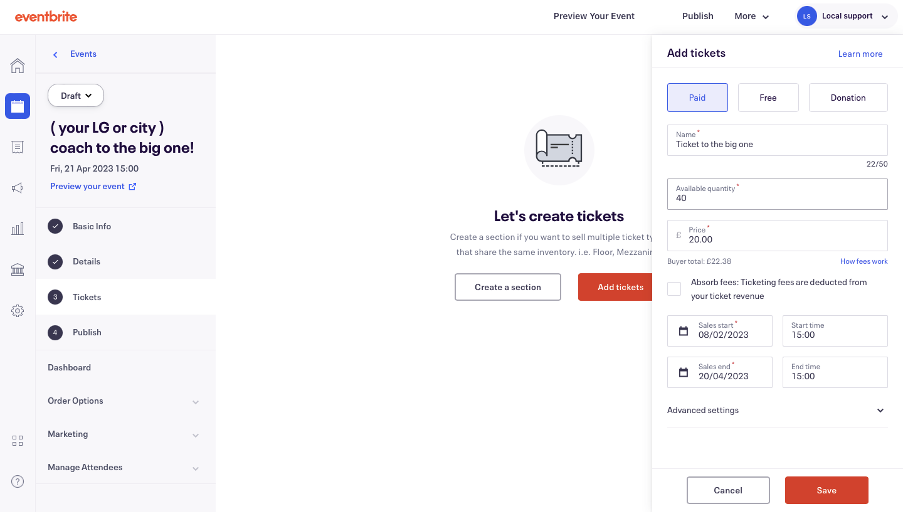
First click ‘Tickets’ on the left of your screen or 'Add tickets' in the middle of the screen, on the event dashboard page. This will open up a section to the right on your screen.
If your event is free to attend, select the 'free ticket' box, or if it's paid click the 'paid' box.
In the ticket name, Give it a name, such as 'Coach ticket to The Big One'. If you are offering different types of ticket you can specify those here, eg 'Coach ticket to The Big One- child'
For the available quantity add the amount you have capacity for. You can break up that capacity across multiple ticket types if needed.
It is important that you do not select ‘absorb fees’ when setting up the event, as this will mean you will be paying for the fees even if the ticket gets refunded, this will affect your payout from Eventbrite.
Make sure the currency is set to £ pounds and the country is set to the UK. Eventbrite payment processor should be automatically set.
You will then need to enter the time period the tickets will go on sale and an end time to stop selling tickets.
Once you have entered the name, amount of tickets, price of tickets (inclduding free) and time length for the sale of tickets, click save.
The payout from tickets sales
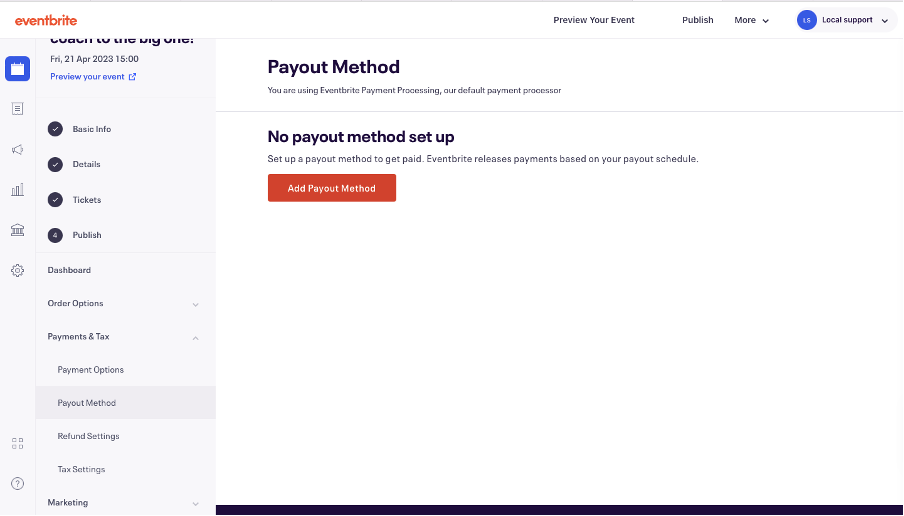
To withdraw the money paid for your ticket sales, on the event dashboard/edit page and once you have set tickets up, go to the left-hand sidebar, click ‘Payments & Tax’ and then 'Payout Method'. From here click ‘Add Payout Method’. This will then ask you to enter your bank account details.
Once you have entered your bank account details you will be sent the page below. To change the payout schedule click ‘Payout Schedule’ on the left side of the screen.
You can now chose from the following payment options:
- total amount 3 days after the event
- weekly on Wednesdays
- twice a month on the 1st and 15th
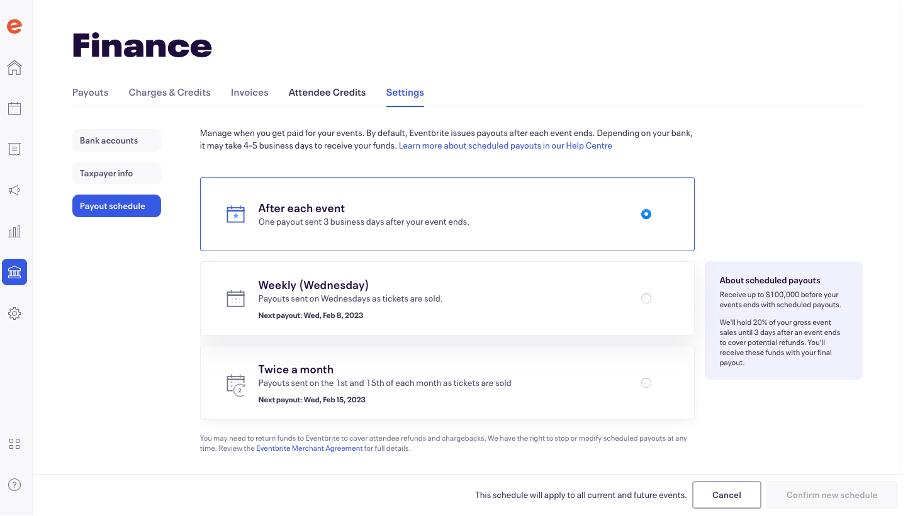
However if you chose either of the second two options, Eventbrite will hold back 20% of the ticket sales until after the event. But you may still want to withdraw some of the funds- it could be useful if someone has paid a big deposit and can't wait until after the event to be repaid. On the negative side, multiple withdrawals makes keeping track of the accounting a bit more complicated.
Eventbrite charges VAT, so we don’t need to change or edit the tax settings.
Refund policy
You need to select a refund policy, which must be on your event page. Refund policies may not be changed retroactively. We recommend setting this to 'On a case-by-case basis'. This means that if someone wants to ask for a refund, they can email in with their order number and a possible reason why. Setting up auto refunds puts you at risk of bad actors or being left in a financially difficult situation.
You will get an email notification if someone asks for a refund. You must respond to this within 3 days, and the email from Eventbrite will tell you how to process the refund.
By default, fees are not refunded on orders. This means that the attendee will receive a refund for the amount they paid minus the Eventbrite fees. There are a couple of exceptions: If the refund is made before the charge has settled (usually within 24 hours), the original charge will be completely voided. If the refund reason is "COVID-19", "Duplicate order", or "Event cancelled or postponed", the fees will be refunded as well.
If there are enough funds in your event balance to cover the refund, then Eventbrite will use those to pay for the refund. If there aren't enough funds in your event balance to cover the refund (because you have withdrawn some of the money), you have two option:
- You can add funds to your event. This option is best if you need to issue multiple refunds or partial refunds.
- If you don't add funds to your event, Eventbrite will ask for a debit or credit card to pay for the refund. This option is best for individual refunds, and you must refund the complete order this way.
To find out how to set the refund settings, go to the left-hand side bar on your events dashboard, then click ‘Payments & Tax’ and then click ‘Refund Settings’. You will need to select ‘On a case-by-case basis’ and click ‘Save’.

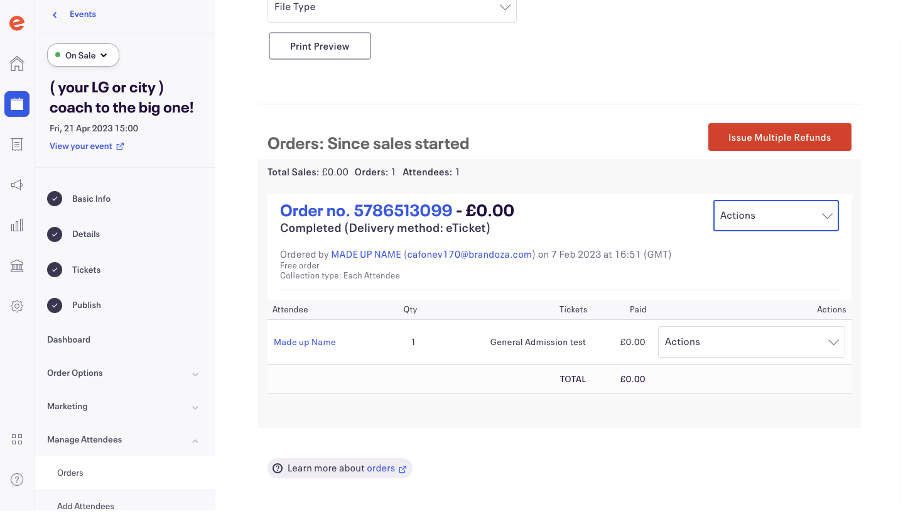
How to issue a refund
Go to the left-hand sidebar on your event dashboard, click ‘Manage Attendees’ and then ‘Orders’. To issue a refund, you will need either their name, email or order number. You can then use the search bar to search for this information. Press enter on the keyboard to generate the report.
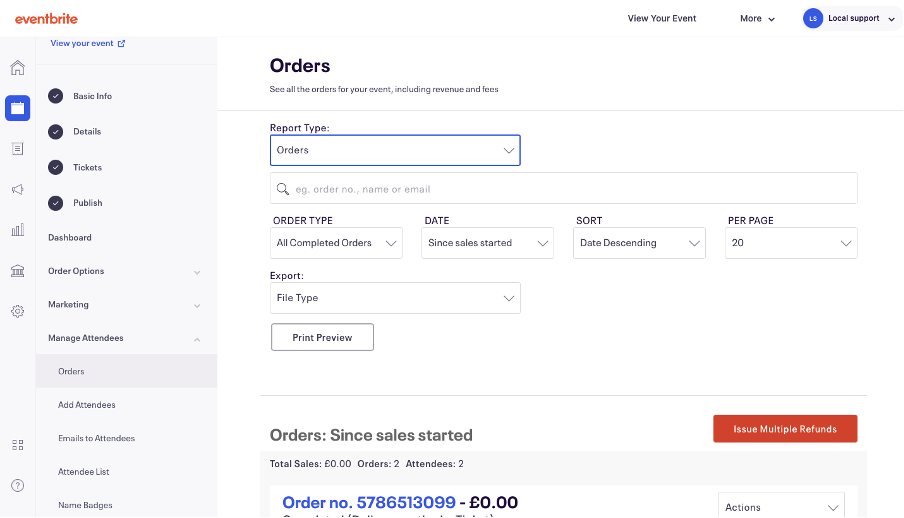
Once you have found the order to be refunded, on the right side of the order information, click ‘Actions’, and on the drop box menu that opens select ‘Issue Refund’. Then fill out the refund details, including the refund reason, which tickets you want to refund and the amount you want to refund (this should be 100%, unless the purchaser has asked to donate some of the cost of the ticket). Then click continue, add any 'Notes to the buyer' and then click 'Issue Refund'.
Creating your event: Order Confirmation and Order From
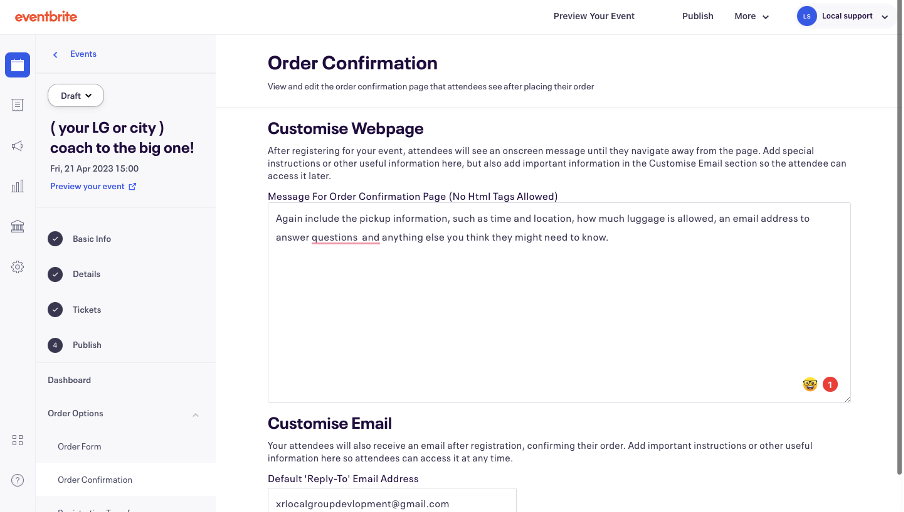
Once someone buys a ticket, they will be shown an order confirmation page. It’s helpful to include some basic information, including event accessibility, timings, and an email so people can ask questions.
You should then also put this information on the email confirmation that people will receive.
To edit this page, on your event dashboard go to the left bar and click ‘Order Options’ and then click ‘Order Confirmation’. Then you can add details to the the confirmation webpage and the email confirmation in the boxes below. Make sure to use the XR email you used for the account and public enquiries, in the 'Default 'Reply-To' Email Address' box.
Once you have added the text you want, click ‘Save’ at the bottom right-hand of the screen.
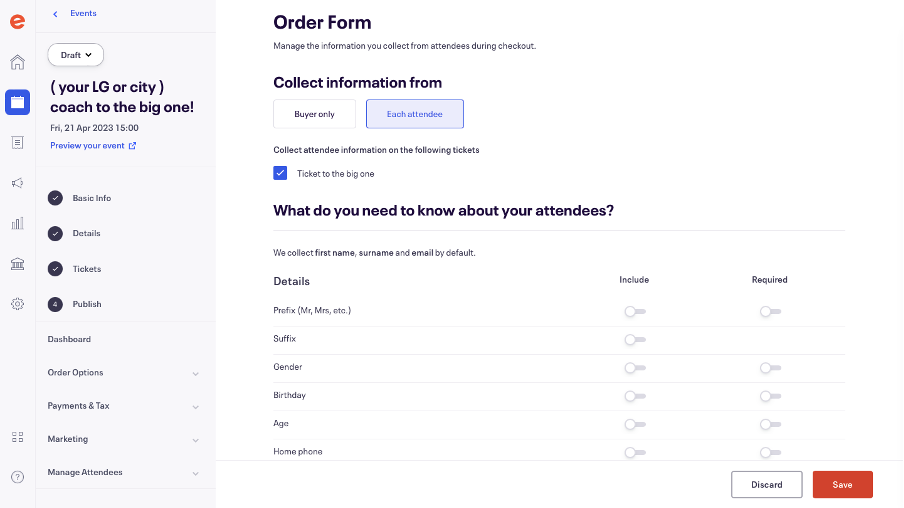
Order form
You can choose to ask more questions during the order, such as phone numbers. Eventbrite automatically collects full names, and email addresses, this can not be turned off. We recommend keeping the settings standard as you are unlikely to need to collect more than names and emails: do not collect more data than you need to. However, you may want to change the settings so it collects information on each attendee, as if a rebel books two tickets, then you only have the information for that one rebel. By collecting for each attendee you can easily track attendees on the day of the event. This will also mean you can email important updates to all attendees and not just to the person who made the booking.
To change this setting, you need to click ‘Order Options’ on the left hand side bar, then click ‘Order Form’. Then under “Collect information from’ click ‘Each attendee’ and then click 'Save' on the bottom right.
Creating your event: Publishing and finding your event in your Eventbrite account
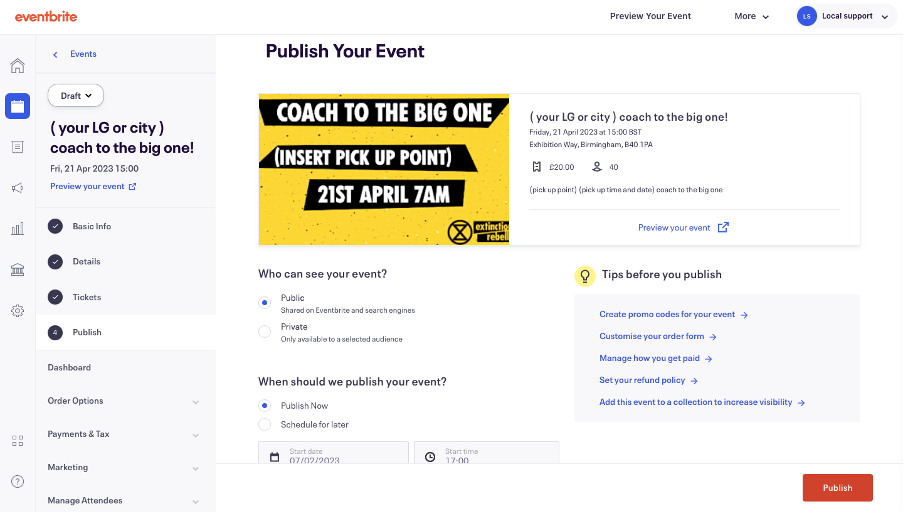
Once you are happy to publish your events, and have double checked all the text, information and settings are correct, then you can publish by going onto the events dashboard. Then clicking ‘4: Publish’ on the left hand side bar. This will give you an option to preview the event, as well as being able to decide if you want to publish straight away or schedule publishing for later. Once you are happy click ‘Publish’ on the bottom right corner.
XR Volunteer Agreement and GDPR
Eventbrite has the ability to let you email ticket holders directly through Eventbrite. This functionality is only meant to be used to send email relating to that specific event. This does not mean you can then use this function to email about XR, just about the event you are organising.
Everyone who has access to the data from Eventbrite should sign the XR Volunteer Agreement here : XR Volunteer Agreement
You should only share data on a needs basis to rebels who signed the above agreement and dispose of any data you stored after using it.
Find out more about GPDR here : GDPR and Personal Data
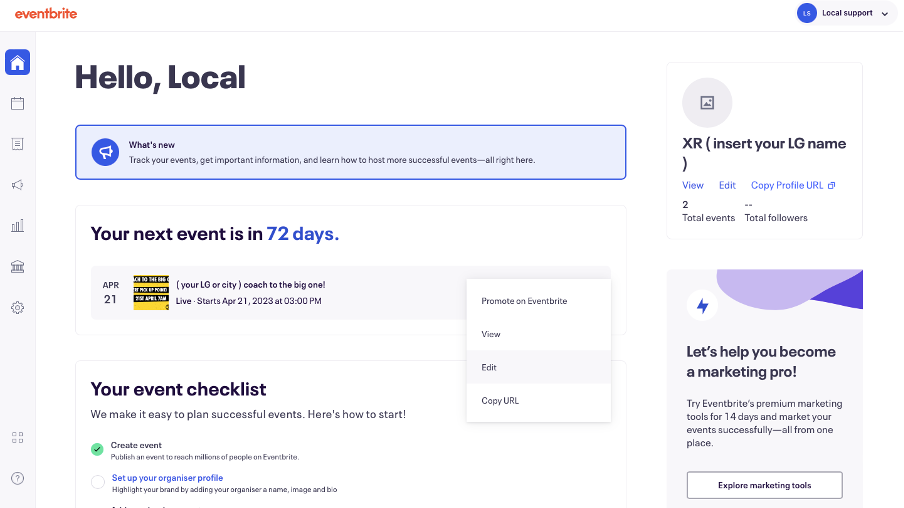
How to find your event in your Eventbrite account
Log in and then click on the icon in the top right hand corner- which will be your account email or name. Then click ‘Manage my Events’. From here you can find all the events you are planning.
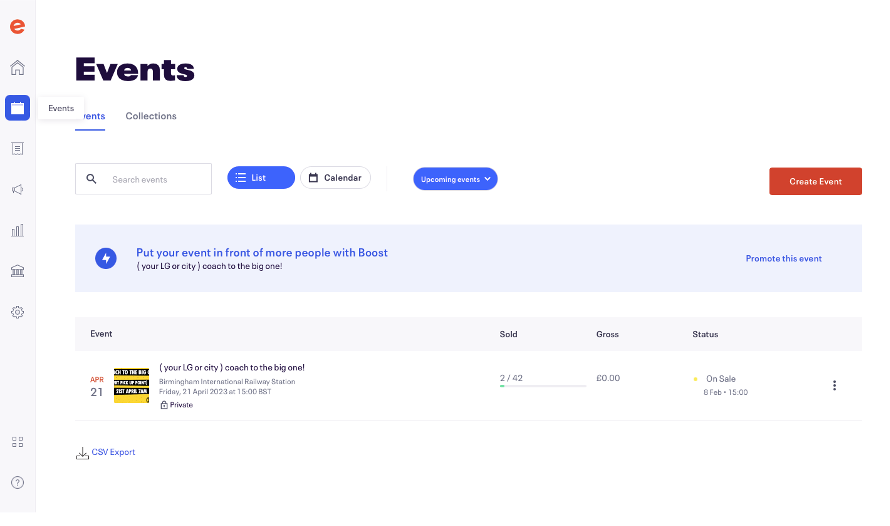
You will be taken to this page, which will list your next event. Click the 3 dots on the right hand side of the event title, and this will open up several options. ‘Copy URL’, can be used to share your event, and ‘Edit’, which takes you back to the event page, and you can use the same process as when making your event. Just make sure to click save on each page or setting you edit.
If you are running more than one event, you may need to click the calendar icon in the left sidebar, which says ‘Event’ as you hover over it with your mouse. Click this, and it will take you to all your upcoming events. This page will also tell you how many tickets are have been bought and the amount of money raised. Clicking your event will take you to the event dashboard.
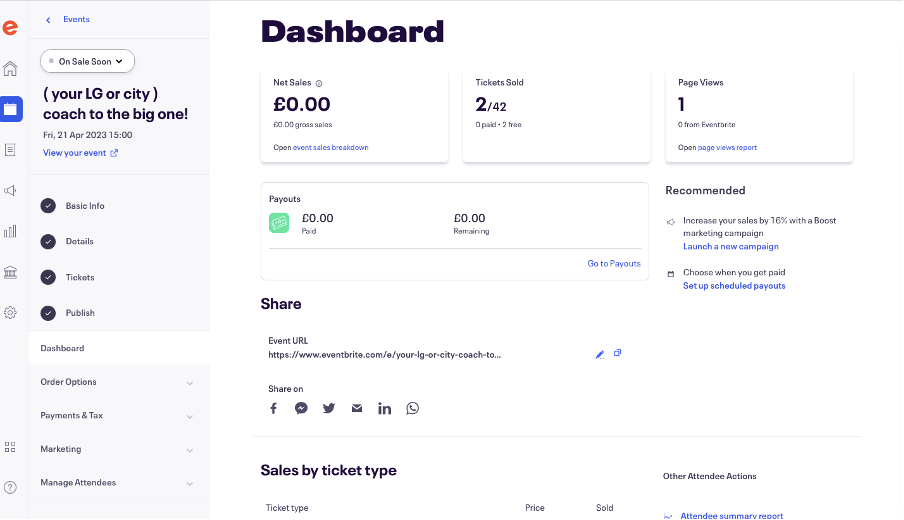
The event dashboard will also tell you about ticket sales, page views, and links to share the event.
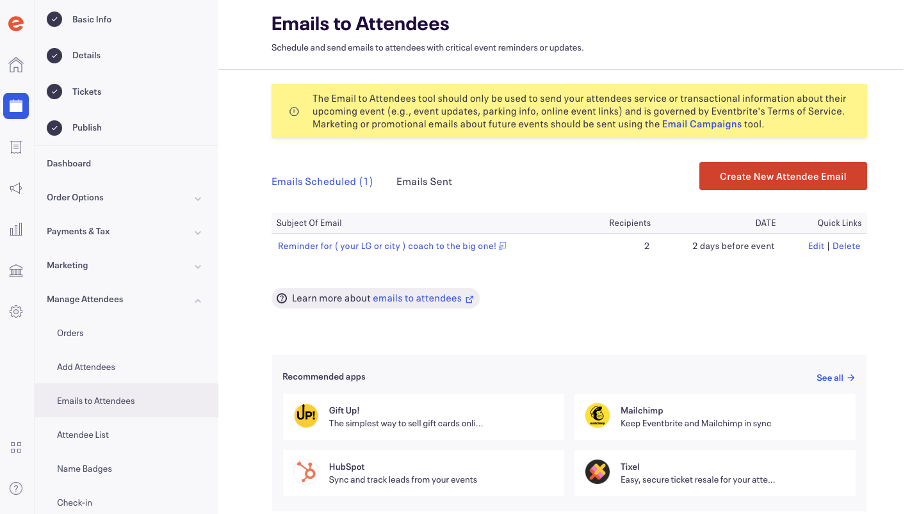
How to send an update email and how to access your attendee list
Sometimes you may need to send an update about your event, such as changes to the time or place. There is also an automatic 2-day reminder email that Eventbrite sets up to remind people about the event.
To send an update email to your ticket holders, you need to go to the Event Dashboard (as described on the previous page), and on the left-hand side-bar, click ‘Manage Attendees’, which will open a new menu on the page, then click ‘Emails to Attendees’ in the left sidebar.
To send a new email click the orange ‘Create New Attendee Email‘ button on the right side of the screen.
This will then open a new page where you enter the name of your group; your reply to an email address; and the subject title of your email. To send to all ticket holders, select ‘All Attendees’ in the ‘To’ drop-down menu. Then you can add your text in the large text box labelled ‘Message’.
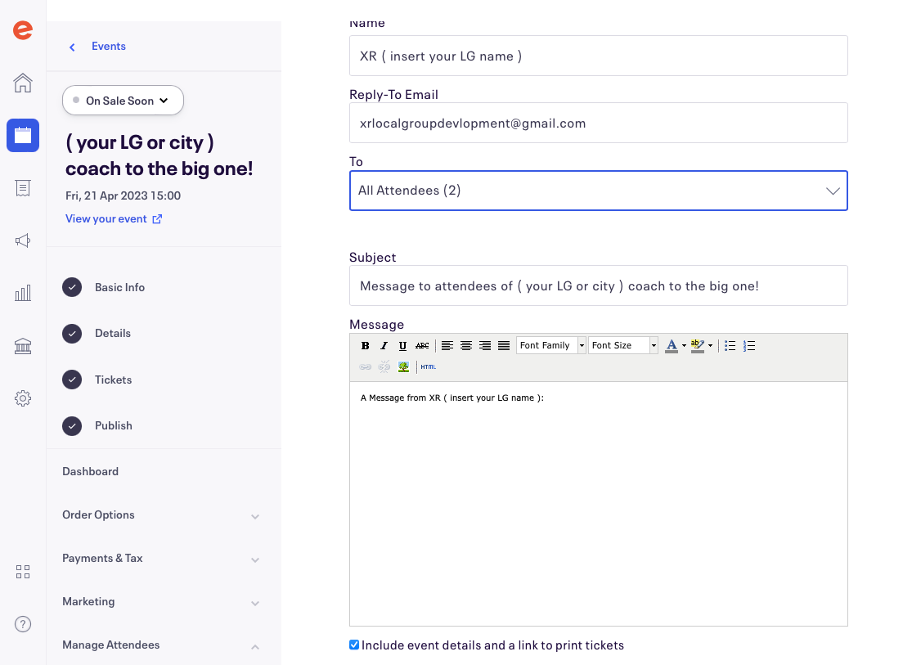
Once you’re happy with your email, you can send a test to your own email, to make sure you are happy with how the email looks, or for someone else to proofread the email. Enter your email (or your proofreaders email) in the ‘Send Test Message To’ text box and click ‘Send Test’. Then you can review if the email looks good.
Then you can either schedule the email for a specific day and time, or send the email straight away. Once ready click ‘Send Now’ to send the email straight away or ‘Save’ if you choose to schedule the email.
The email must be about the event onnly, with no other updates or email shout-outs.

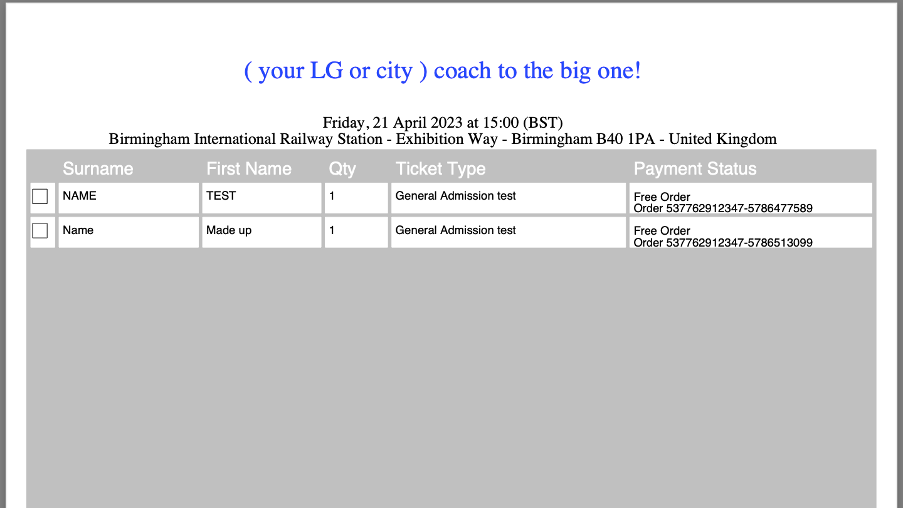
How to access your attendee list
Accessing your attendee list can make it easier on the day to track who has and hasn’t turned up, and to an extra layer of security so that only people who are meant to be there are at the event. This can be done by ticking people’s names off against the list as they arrive at the event. There are also options to use your phones to check people into the event with an app, but on paper is a simple way to keep track.
To download the attendee list, on your Event Dashboard, go to the left sidebar, click ‘Manage Attendees’ then click ‘Attendee List’. This will then take you to a new page and give the option to ‘Download List as a PDF” button, click this and it will open a new tab with your attendee list.
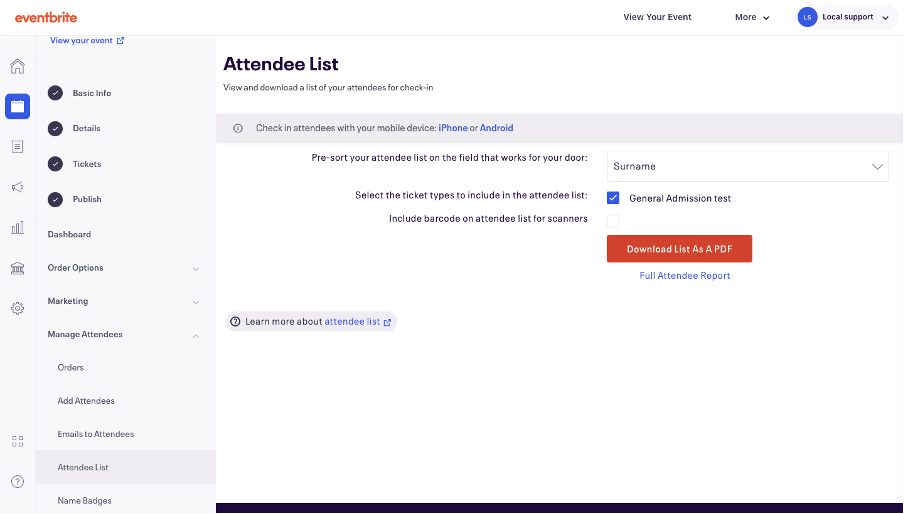
Your attendee list should look something like the image below, which you can then print off or save. Remember to safely shred or dispose of this list once you are done with it. Only people who have signed the XR Volunteer Agreement and need to see this information should have access to this list.