Creating your event: Tickets and Finance
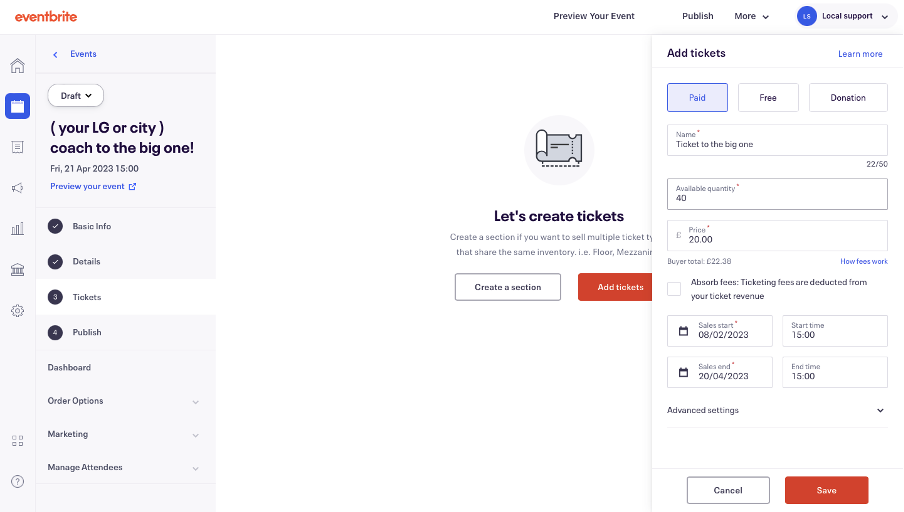
First click ‘add tickets’ on the left of your screen or middle of screen, on the event dashboard. This will open up a section to the right on your screen.
In the ticket name, Give it a name, such Ticket, or ticket to, or the tpye of ticket it will for, such as 'free', 'discounted ticket' and ect.
For the available quantity add the amount you have capacity for. You can break up that capacity across multiple ticket types if needed.
It is important that you do not select ‘absorb fees’ when setting up the event, as this will mean you will be paying for the fees even if the ticket gets refunded, this will affect your payout if this is a charged for event .
Make sure the currency is set to £ pounds and the country is set to the UK. Eventbrite payment processor should be automatically set.
You will then need to enter the time period the tickets will go on sale and an end time to stop selling tickets.
Once you have entered the name, amount of tickets, price of tickets (inclduding free) and time length for the sale of tickets, click save.
**

