
Facebook Events
This page will teach you:
- how to create an event
- how to make another page a co-host for your event
- how to add an existing event to your page
For help using the rest of Facebook, head over to the Facebook page of the Social Media book
Create a Facebook event
Get your cover ready
Check this folder in case the cover you need is already there. Best to use something that already exist than reinvent the wheel!
If you feel crafty, head to Viz Gen / Aktivisda to create your cover. The correct Facebook event photo size has the dimensions of 1920 x 1005 pixels (a 1.91:1 ratio, or about 2:1).
💡 Good practice: centre your title so it looks better on the events menu (as shown below), avoid writing too much text (your text should be inside the event, not on the cover), make sure your text is easy to read (use a simple background, pick contrasted colours, for example black on yellow or white on dark blue).

Start creating your event
Watch the step by step tutorial or follow the explanations below:
- Switch to your page profile them go to your landing page (click the Facebook logo). Click here for a reminder on how to do this.
- On the left-hand side column, click the "events" button.
- Click the blue button "+ create new event".
- Add your cover icon.
- Give your event a catchy name (make it self explanatory, for example: XR Manchester Weekly Meeting).
- Set up a date and time (recurring events will be explained below), don't forget to add an end time so people will know how long your event is.
- Select "in person or "virtual"
- if it's in person, you can add an address ("add location")
- if it's virtual, you can add a link in "external link"
- in both cases, it's safer to repeat this information in the description of your event.
- Write the description ("what are the details"):
- What should people expect from this event? How to join? Will there be food? Is it accessible? Should they bring something?
- You can add emojis to create a better reading experience (but don't abuse them) by copy/pasting them from an outside source (Telegram, Word, an emoji bank...)
Recurring events
If you have regular meetings, you might want to set up your event as a recurring one to avoid having to create a new event each time.
Select "repeat event" in the menu.
Then select a frequency in the drop down menu.
If your event happens fortnightly, select "custom".
Now select all the dates when your event will happen.
If your event always happen at the same time, add the time to the first date then tick the box "Add this time to all dates", then click "add". Otherwise, add the times for each dates separately.
Co-hosting an event
Add a co-host to your event
A co-host is another organisation or local group that is co-organising an event with you. They will be able to modify your event, so make sure you're only adding trusted pages as co-hosts.
When you're in the process of creating an event, scroll down a little after writing your description and click "add co-host".
Write the name of the page(s) you want to add (for example: Extinction Rebellion UK) or their username (in that case: xrebellionuk).
A username is a unique name you will find when visiting a Facebook page and looking at the URL. It's what goes after facebook.com/
-
https://facebook.com/xrmidlands/ 👉 username = xrmidlands
-
https://facebook.com/xrUKTalksandTraining/ 👉 username = xrUKTalksandTraining
Some pages have not yet picked a username so they will have numbers as well in their URL.
💡 If you often create events with the same co-hosts, make yourself a spreadsheet with their usernames so you only have to copy/paste them insteas of writing down the name of each page every time.
⚠️ Be careful of selecting the right page. Sometimes Facebook is a bit cheeky and will pop a list on your screen (it might be a glitch, it could be fake pages too), as shown below:
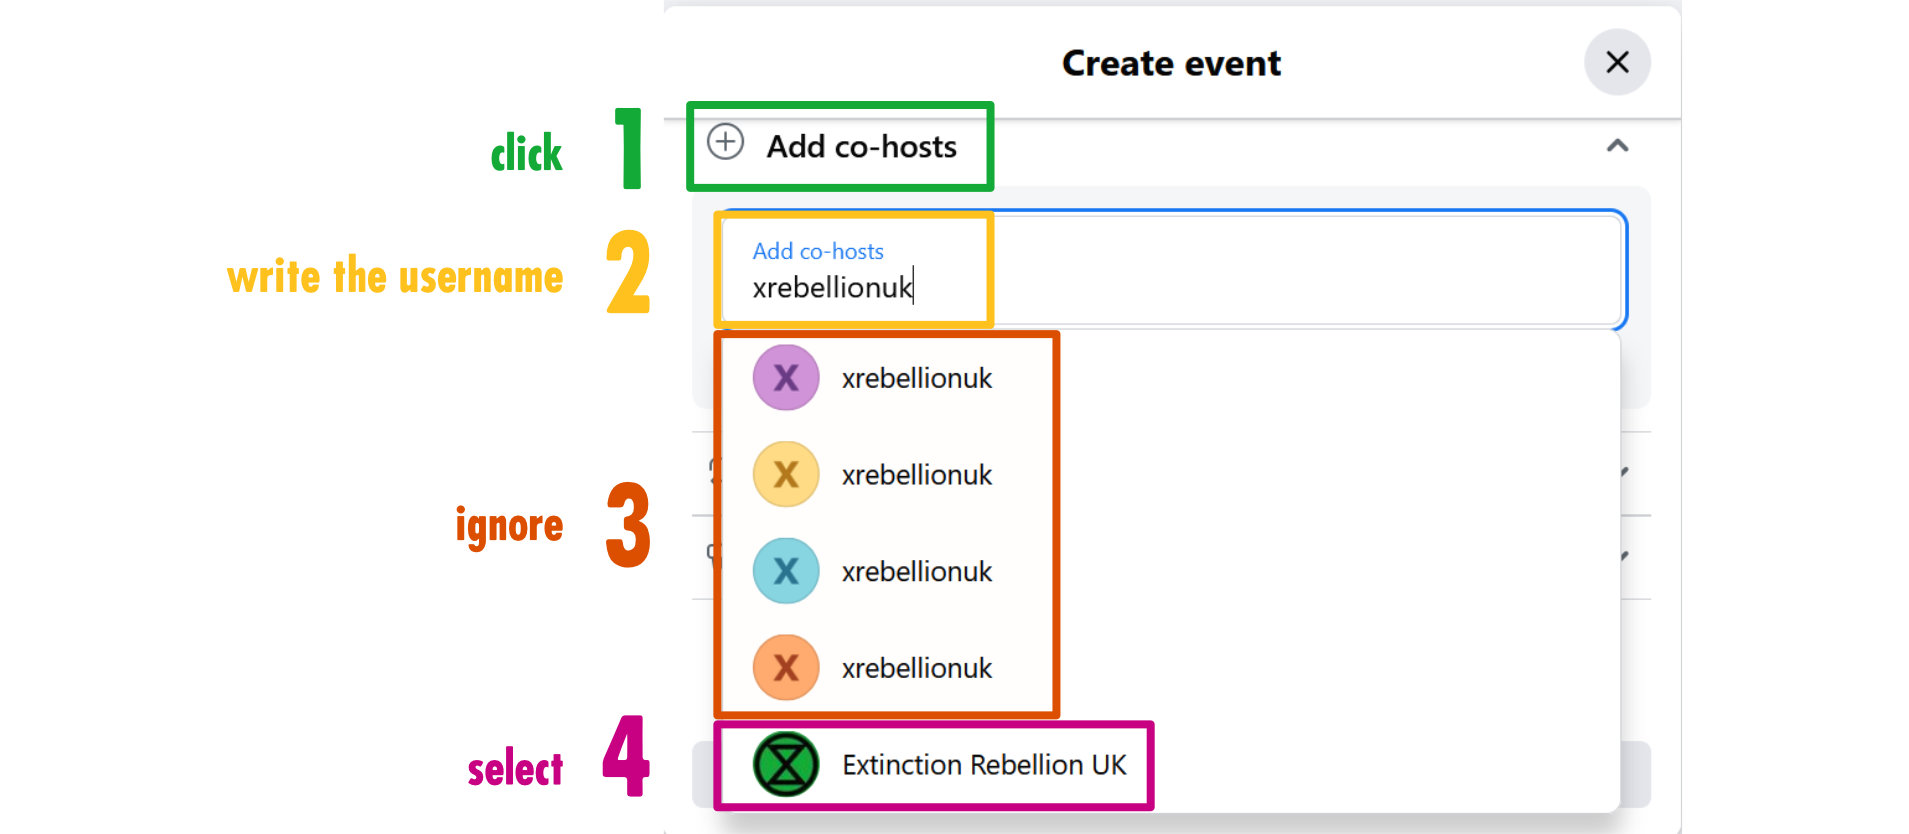
- Click add co-hosts
- Write the username or name of page
- Ignore the pages without the proper logo
- Only select the page showing up with the proper logo
- Repeat to add more co-hosts
Accept a co-host request
If you're lucky, you'll see a notification pop up on your page's profile if you are asked to co-host an event. Sadly that's not always the case. This is a glitch within Facebook.
When you send a co-host request to a page, copy the link of your event and send it via private message (or email, or via a chat if you know one of the admins). This way they will definitely be aware of it.
If someone sends you a co-host request, it'll will look like this:

You can then click "accept" or "decline".
Add an existing event to your page
If you've spotted an event you'd like to advertise on your page but you haven't been made a co-host, watch this step by step video tutorial, or read the explanations below.
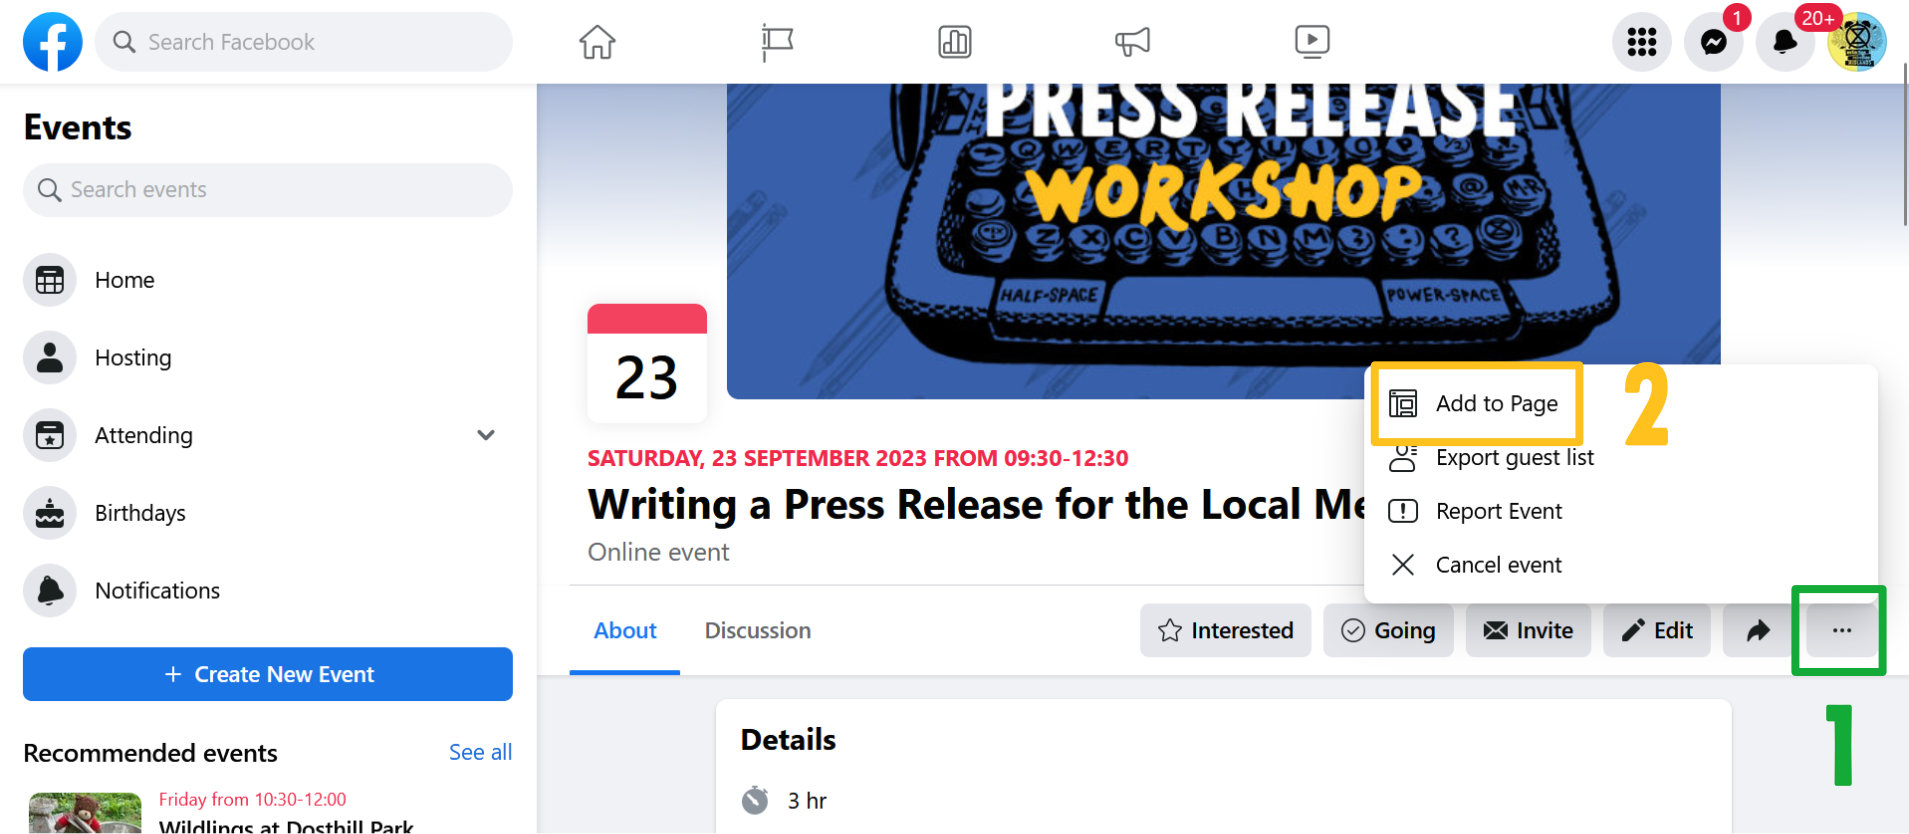
Head to the event you'd like to add, then:
- Click the 3 little dots on the right-hand side
- Click "add to page"
- Check it's being added to the right page then click "add event" to confirm