Business Suite for Facebook and Instagram
Meta Business Suite is a free tool that Facebook page admins can use to manage their pages and linked Instagram accounts. Note that you can't manage Facebook groups with it.
💡 A more detailed video tutorial is coming! We hope that the screenshots will help you navigate Business Suite for the time being.
There is a phone version of Business Suite but we're only covering the desktop version here.
🔗 Accessing Business Suite
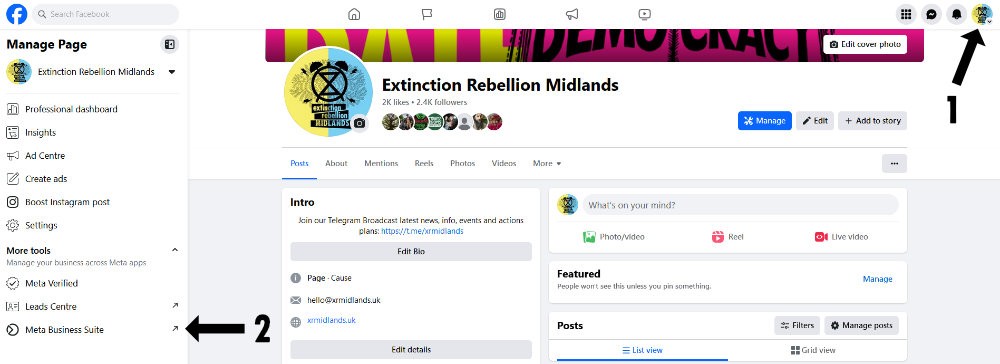
You can either follow this link: https://business.facebook.com or got to your Facebook Page and
- Make sure you're logged in as your page
- Click on Meta Business Suite on the left-hand side column
🏠 Dashboard
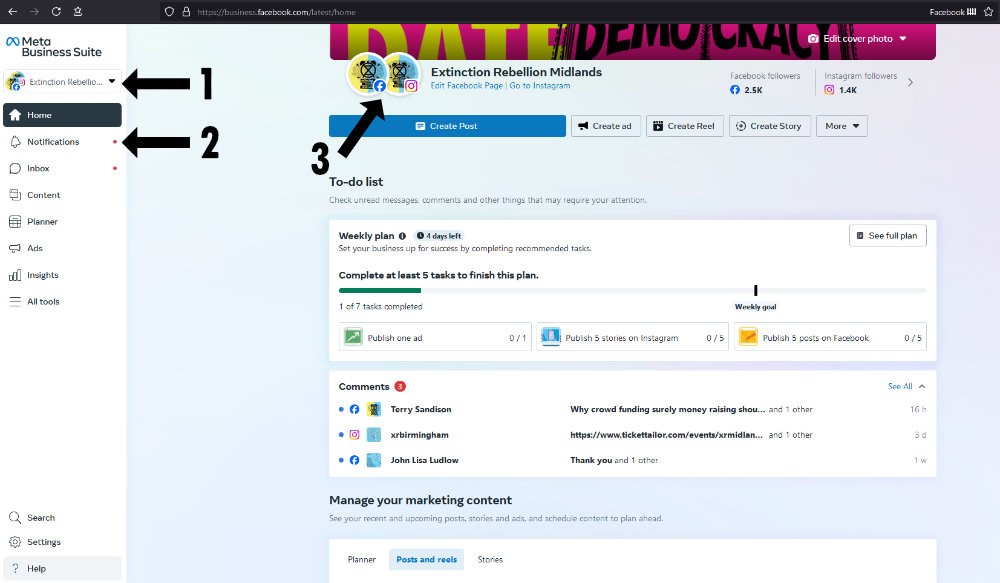
The dashboard gives you an overview of your account.
From there you can:
- Switch between different accounts (if you're the admin of multiple Facebook pages)
- See where your attention is needed when there is a red dot (meaning you have new notifications such as messages, comments etc.)
- Check if your Instagram account is linked to your Facebook page
Link Instagram and Facebook
On the screenshot below you can see that there isn't an Instagram account linked (the logo remains grey). It can be because it hasn't been connected yet, a problem with the connection, or just because you don't have an Instagram account (which is the case here).
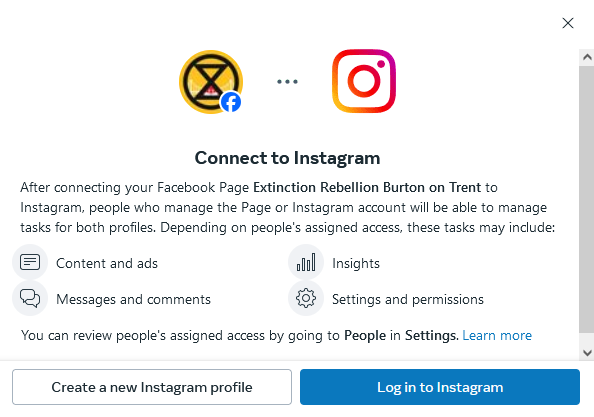
To link your Instagram account to your Facebook Page, click "Connect Instagram" (on the right-hand side of the two logos with the tiny Facebook and Instagram icons). Then follow the process.
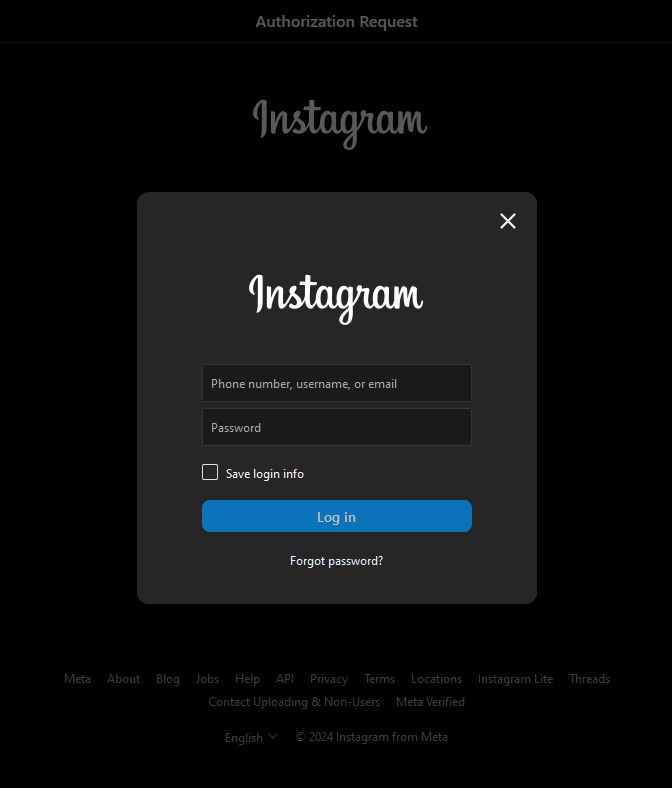
Click "Log in to Instagram" (blue button):
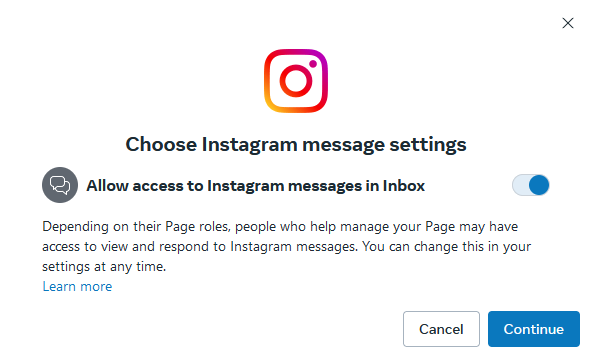
Tick yes for "allow access to Instagram messages in inbox":
Enter your login details (username or email + password).
⚠️ And we mean your XR account login details, not your personal one.
If you're stuck and need support, please contact @lucielc on Mattermost.
🔔 Notifications
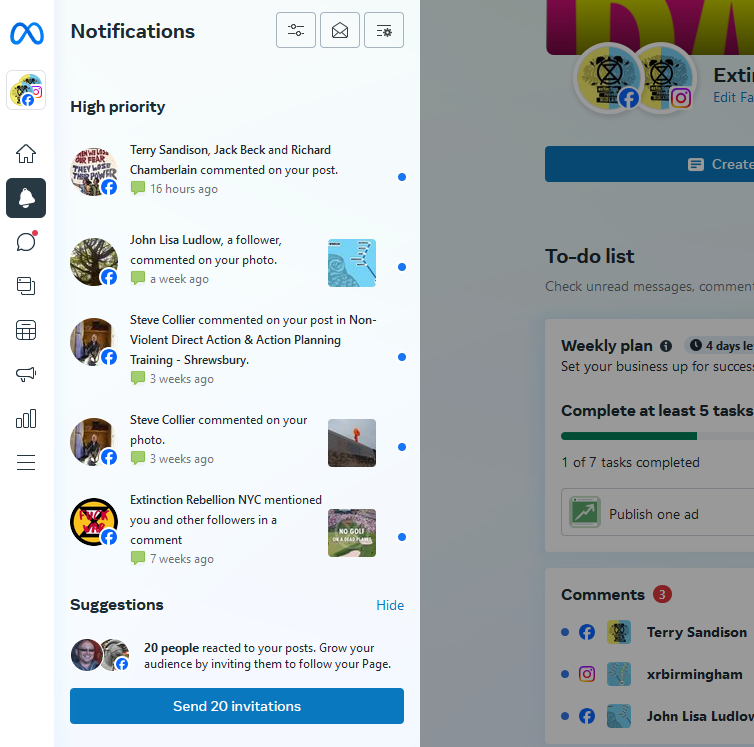
To access the notifications, hover your pointer over the left-hand side column until it appears more detailed, then click "notifications" (bell icon).
That will give you an overview of the most recent interactions people had with your page.
From time to time, you will see a blue button that says "Send 20 invitations". If you click it, it will send a notification to 20 people who recently interacted with your page to invite them to follow it. This way you might gain more followers, yay!
🗩 Inbox: messages and comments
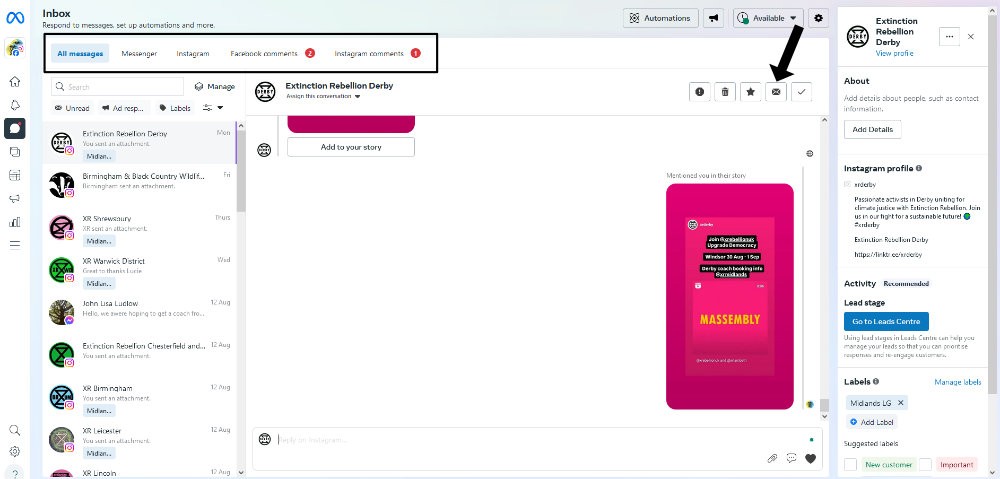
A very important feature! Click the speech bubble in the left-hand side column.
This is the place where you'll be able to read, answer and manage your messages and comments. If you have a new message or comment, you'll see a red circle with a number in it in the horizontal menu.
Terms:
- Messenger: messages sent to your Facebook Page
- Instagram: messages sent to your Instagram account
- Facebook / Instagram comments: comments people have written underneath one of your posts
Manage messages
There is a search bar if you're looking for an old message from a specific person or account.
When you open a message, you can see more information about the person or account who sent it on the right-hand side of your screen.
💡 If you open a message but can't or don't want to answer straight away, make sure to click the little envelop icon above the conversation to mark it "unread" (this way you won't miss it next time you visit Business Suite, or someone else from your team can spot it and deal with it).
Manage comments
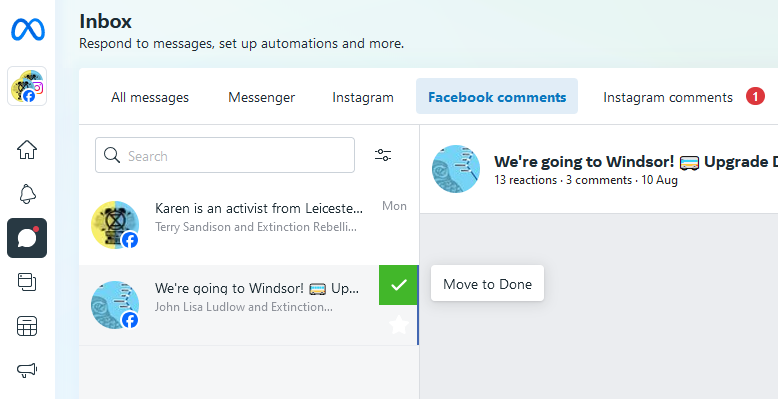
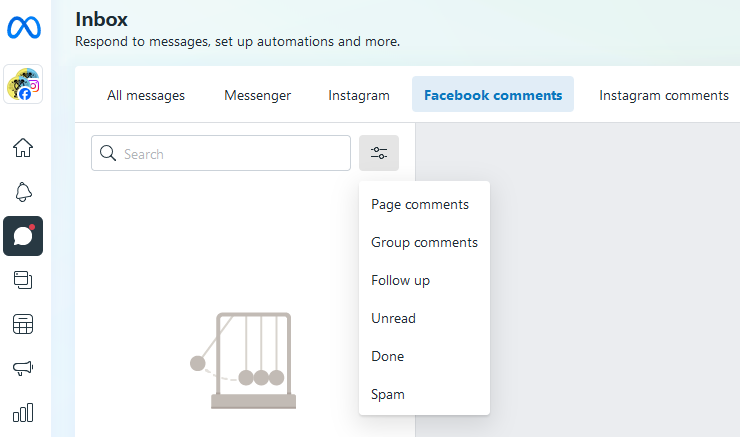
A good practice to keep your inbox tidy and up to date, is to tick the "done" box once you've answered and/or interacted with the comments people wrote.
Don't panic if you clicked by mistake! Head to the filters menu next to the search bar, and click "done" and you will see appear all the old comments you've already dealt with.
🗔 Create Posts
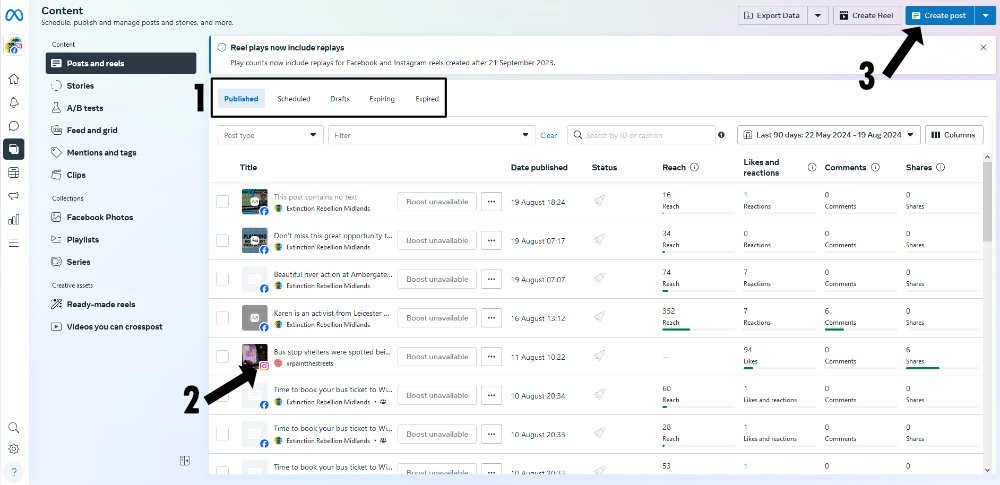
Click on "content" in the lefthand side column.
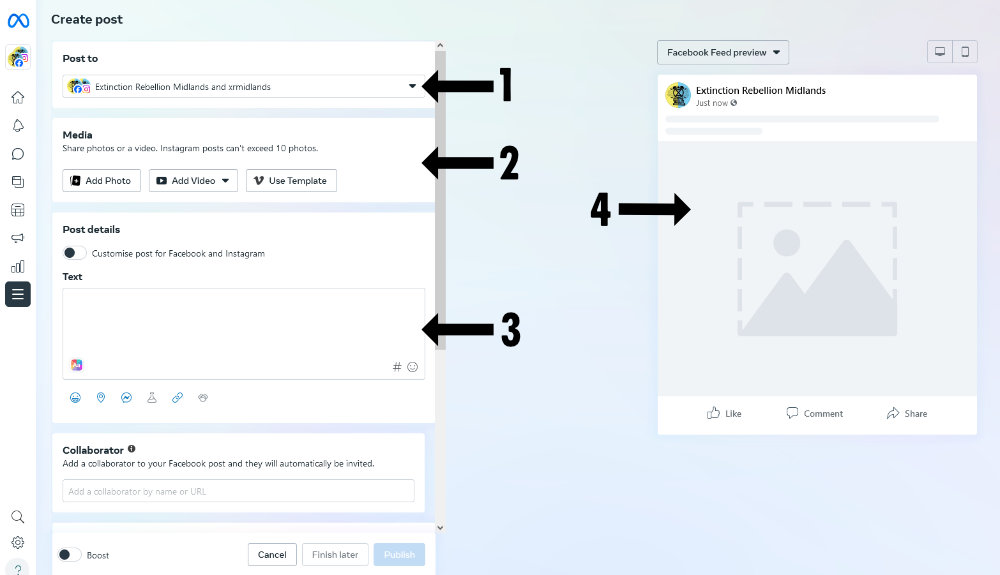
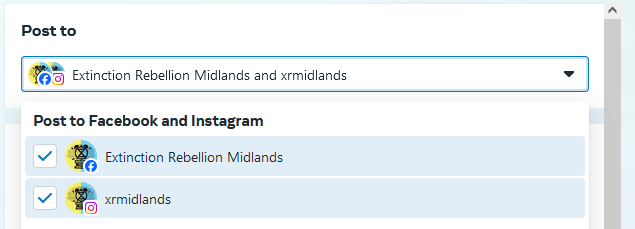
- Post to: select if you want to create a post for Facebook, Instagram or both (it's both by default).
- Media: add a selection of photos, graphics or a video to your post. Read this page for guidance on content.
- Post details: Write your text
- Preview: this is what your post will look like once published.
Select Facebook and/or Instagram.
Keep in mind that these platforms have specific requirements so not all posts should be "mirrored". For example, links are not clickable on Instagram. Read below for more explanations.
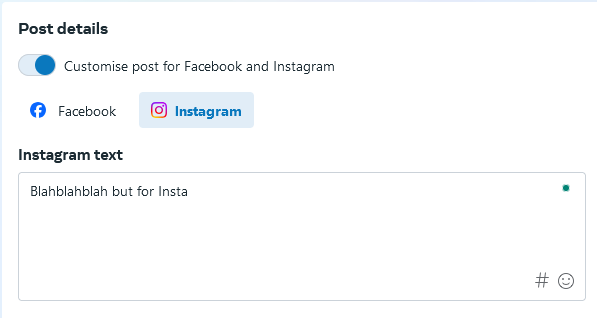
Once you've written your text, you might want to adjust it to fit the requirements of both platforms. Tick "Customise post for Facebook and Instagram". You will see the Facebook and Instagram icons appear.
To edit the Facebook post, click the Facebook icon, and vice versa for Instagram. To keep the same example as earlier: if you have links in your text, delete them for Instagram (add them to your story or LinkTree instead).
You can add collaborators to your Instagram post (note that if you do that you won't be able to add the scheduling option). Not familiar with collaborative posts? Read more about it here.
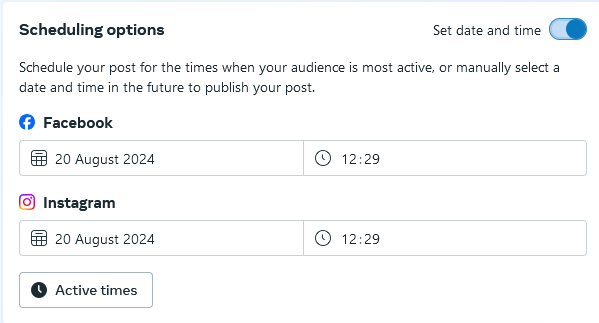
Post straight away or schedule for later (a great option if you want to schedule posts ahead when you have time to keep your socials active, posting regularly is key to reaching more people!).
The "active times" button will give you options for when your followers are more likely to be active and then might engage with the content you post. Note that this option is not always available.
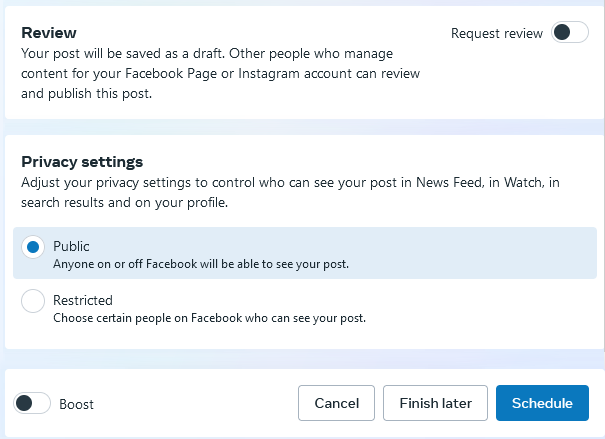
It's now time to publish your post or save it for later.
📊 Insights
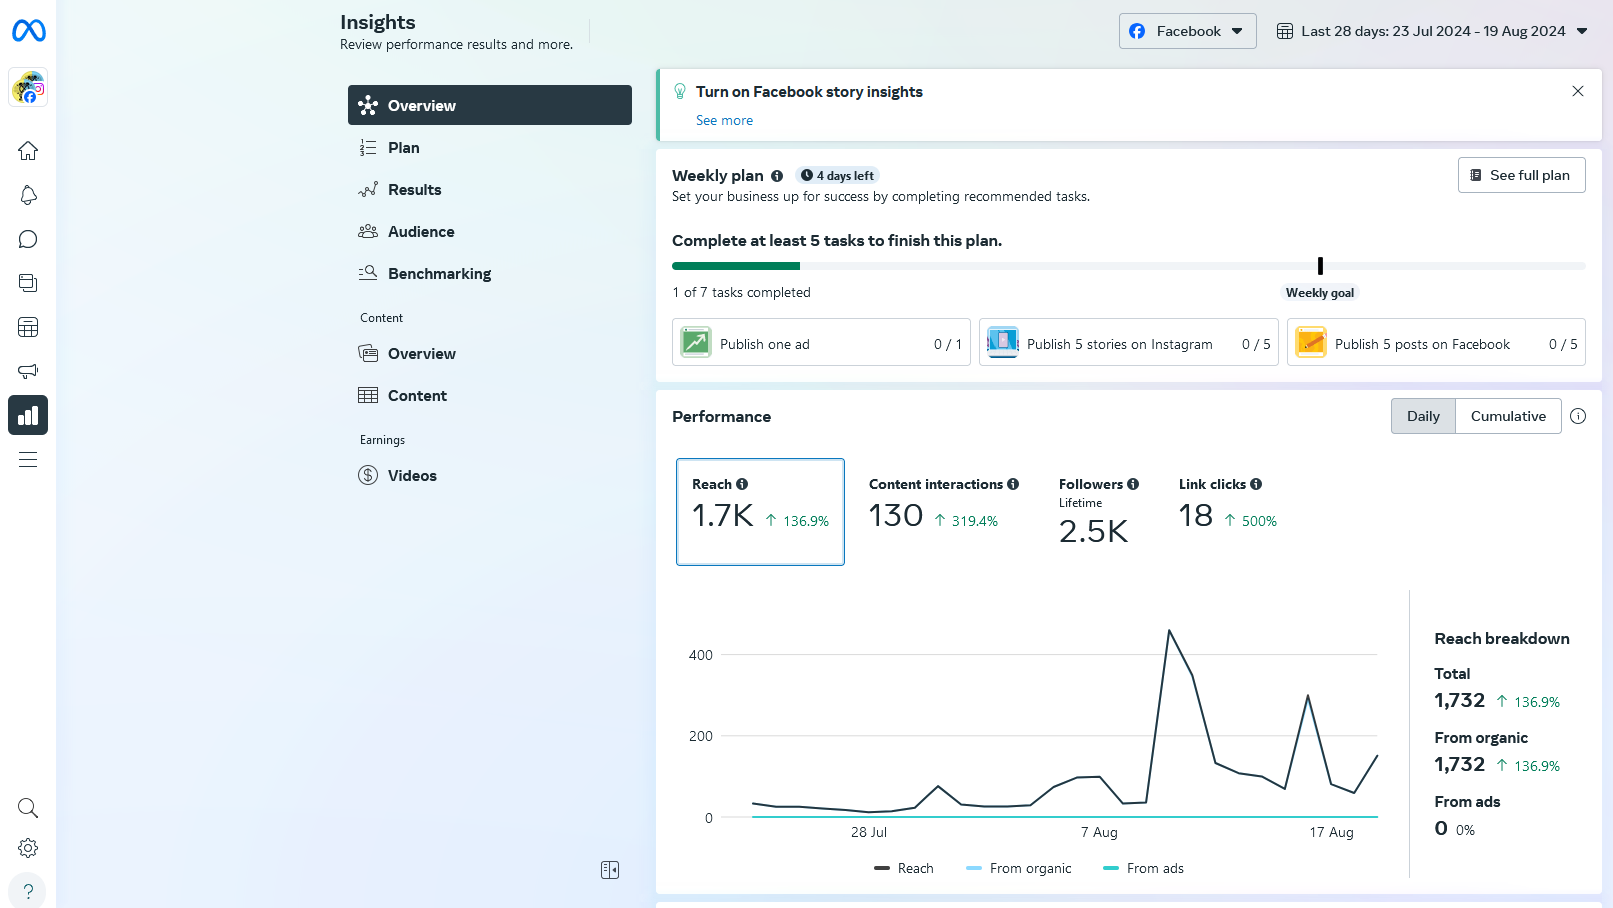
If you like statistics, you'll enjoy this part of Business Suite!
This is the place where you'll learn more about your reach (how many people have seen your posts), engagement (how many interactions your posts received), your audience (demographics, location)...
If you have time, you can investigate the "Weekly Plan" that Business Suite created for you to keep you posting more content (which should in turn help you get a better reach and more engagement, theoretically).
⚠️ Creating content for social media is incredibly time-consuming so don't feel obligated to do more than what you're able to do time wise!

