
Instagram is a social media platform based on visuals (photos and videos). This page will detail everything there is to know about posting on Instagram, from the very basics to more advanced functions.
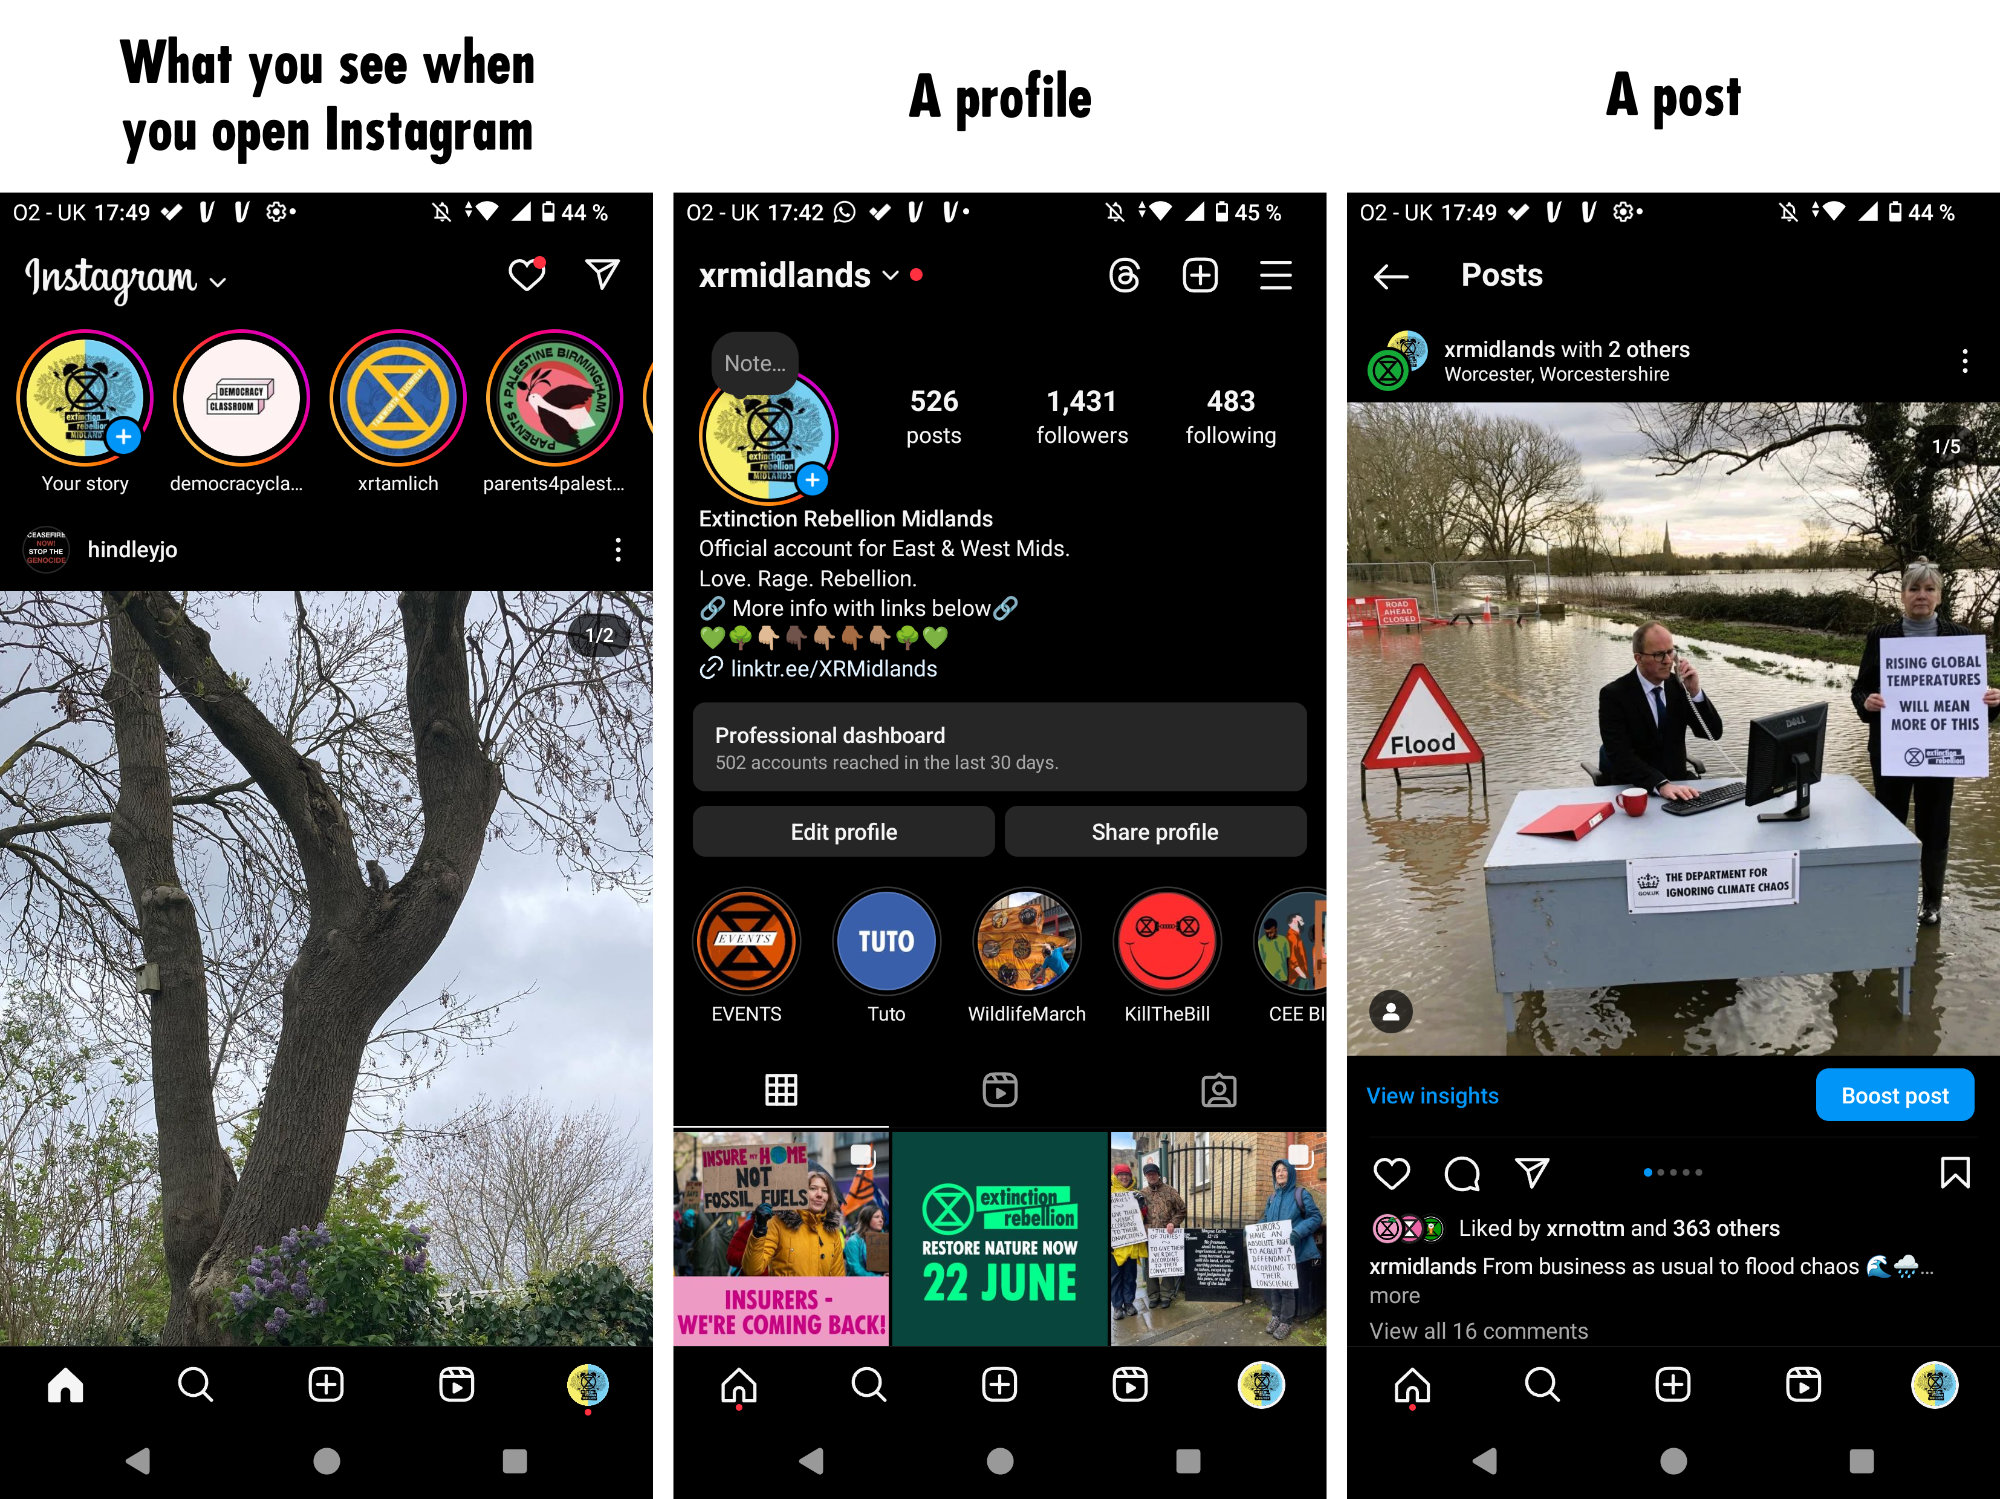
As a warm-up, here's what Instagram looks like:
Create a post
Read below for the detailed instructions or click here to watch a step-by-step video or scroll down to see some screenshots with basic instructions.
- Open the app on your phone
- Click the + button (either at the top of your screen or at the bottom in the middle)
- Take a photo or select one from your gallery
If your photo doesn't fit into the square format, click the double arrowheads symbol on the bottom left corner of your pic.
You can select more than one photo by clicking the square symbol underneath your photo, on the right hand side of your screen, next to the camera symbol. Once this function is activated, you can add up to 10 pictures to your post. Click on the ones you want to add in the order you want to add them to your post. Click again if you want to deselect one of them.
💡 When you add more than one picture, your post is then called a "carousel" because you have to slide laterally to see all the photos in your post. Carousels are valued by Instagram algorithm more than single photo post because spend more time on the app to watch all your photos. It's a good trick to get more visibility!
- Click the blue arrow on the top right hand side corner when you've chosen your photo(s).
- You can edit your photos if you want to (luminosity, saturation...). Move on by clicking the blue arrow again.
- Write the text for your post.
To help your post get more visibility, add some hashtags to it, preferably at the end so they don't make your text difficult to read. Pick hashtags relevant to your post.
For example: #ExtinctionRebellion #BetterWithoutBarclays (if it's an action against Barclays) #EndFossilFuels #ClimateAction
Don't invent hashtags! Try to use some that are already used by other people as they are more likely to be seen.
💡 Links are not clickable on Instagram, unless you put them in a story or in your profile.
- Tag other accounts
If you want to grab someone's attention, you can tag them on your photo. They will then get a notification and are more likely to see your post and share it.
- Add a location (if relevant to your post, completely optional)
How to make a simple post:

Read below or watch the step by step video.
A collaborative post will be shared on two Instagram accounts instead of one. It's not automatic: your request to collaborate on a post has to be accepted by the other account.
What's great about this option is that it'll give your post more visibility as it'll be shown to two communities. It's a good option if your local group is doing an action with another group. This way one person can get the Instagram post ready instead of posting separatly, so it can save you some time.
To create a collaborative post, do everything you would do for a regular post, then click "tag people or add collaborator". You'll see an option to either tag other accounts in the photo or "invite a collaborator".
Search for the account you want to add and invite them.
If it's the first time you're collaborating with someone, you can send them a private message beforehand as well so they are aware that you're going to send them a request and can accept it quickly.
Event reminder
Read below or watch the step by step video.
You can't create event on Instagram as you would on Facebook, but you can create a reminder for people to suscribe to.
Start by getting your post ready with all the info regarding your event (date, time, place etc.) then click "add reminder".
Write your event name and add the start time.
People seeing your post will also see a little insert at the bottom inviting them to suscribe to the reminder, and they will get a notification before the event start to remind them about it.
A story is a type of post that will exist for 24 hours then disappear.
Stories can be used to promote a regular post, to remind your audience of an event (for example: "We're meeting tonight at 7 PM"), for breaking news, for information you don't want to post permanently to your timeline, to interact with your followers etc.
You will find stories at the top of the Instagram app when you open it.
▶️ Watch the tutorial to learn how to create a story (2 minutes): https://youtu.be/uQk6AVo53_Q