
Using the Hub: The Basics

This is the Hub home page. Here you can see links to many of XRUK's services. Click on any of the icons to go to them. Most browsers allow you to click while holding the Ctrl key to open the link in a new tab.
The grey area at the top contains links to training on the XR communication tools. If you already know all about the the subject, click "I'VE DONE THIS" and it will show you the next set of training. Once you have done them all, it will disappear (but you can get it back – there is a link at the very bottom of the page, if you scroll down).
Some of these icons only show if you are logged in to the Hub – click LOG IN in the top-right corner:

Admins will have extra options on this page, e.g. to invite other people to the Hub and XRUK's services.
Joining new XR groups
When you are invited to join the hub, or to join a new group on The Hub, you should get sent an email (check your spam folder if you can't find it). If you click on the link in the email, it will take you to a page that looks something like this:

Click the Create Hub Account button. You will see the following screen:
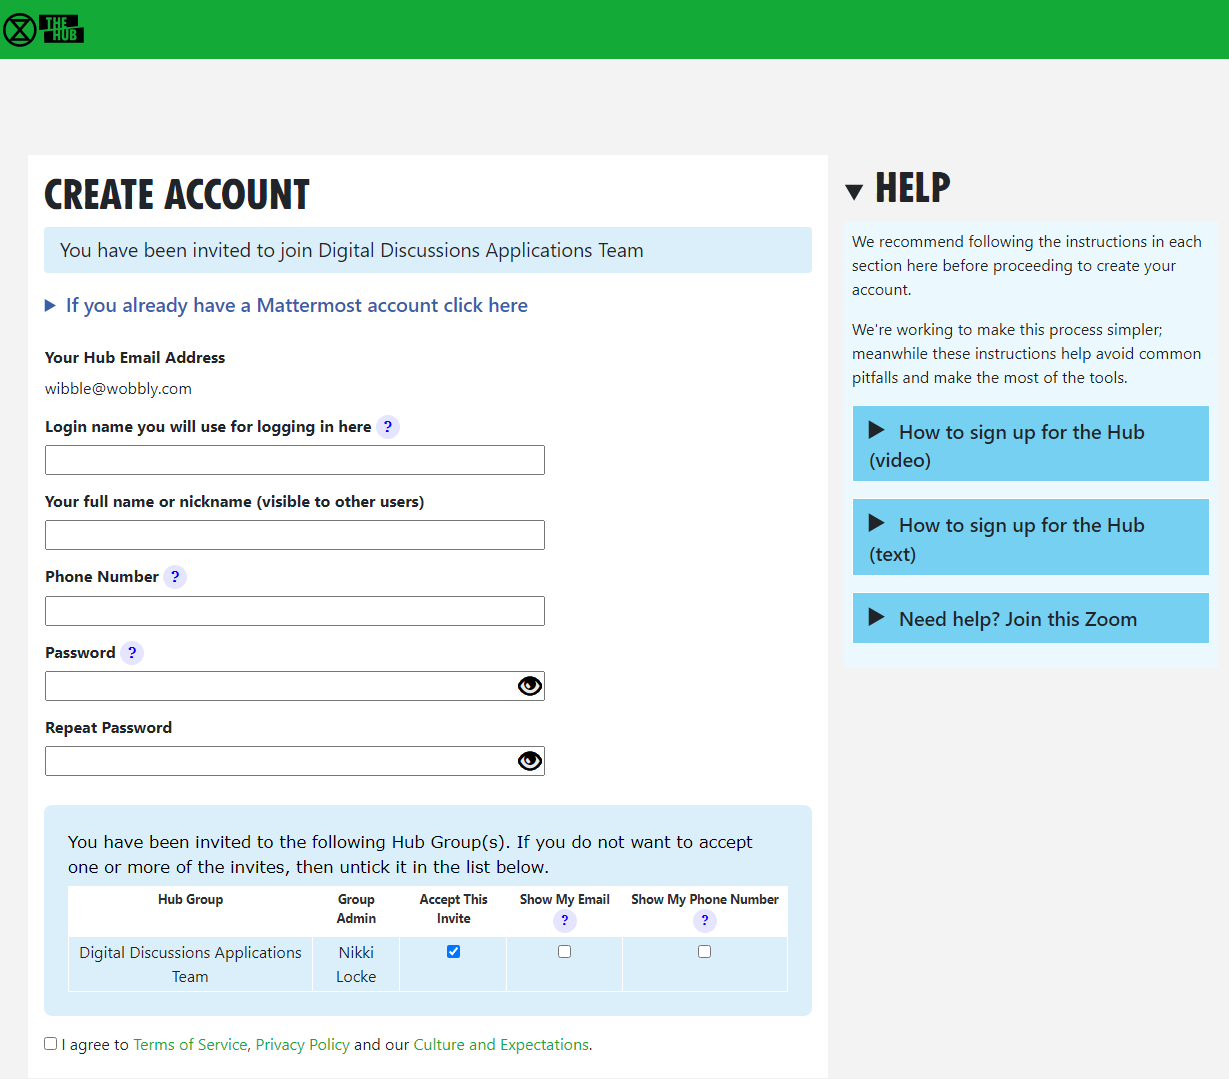
(If you are already on the Hub, some of this information will already be filled in.)
Notice the list of groups you have been invited to at the bottom of the screen. For each one, you can choose whether members of that group can see your email address and/or phone number. If you don't want to join one or more of the groups, you can choose not to accept the invite (by unticking the Accept box) – you will not be asked again (unless you are sent a new invite).
Simply fill in the form and click Confirm. You will be automatically added to the group(s) including all of its channels and forums.
It is also possible to accept your invites by clicking on Accept My Invites from the Hub home page.
Parts of the screen

- Hub logo – clicking here takes you back to the Hub Home Page
- Services – click here to go to the Services page
- Groups – click here to go to your Hub Groups
- Your menu – click here to drop down your menu (including your settings, help and logging out)
- Menu bar – all the options relevant to the current screen
- Menu bar overflow – if there isn't enough room on the screen for all the menu bar options, the extra ones will drop down if you click here
- Actions bar – all the options relevant to the current screen, e.g. Save or Delete
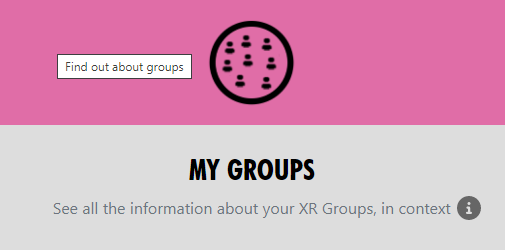
My Groups
You can see the groups you are in by clicking the My Groups tile:
Or select the GROUPS menu option:
 .
.
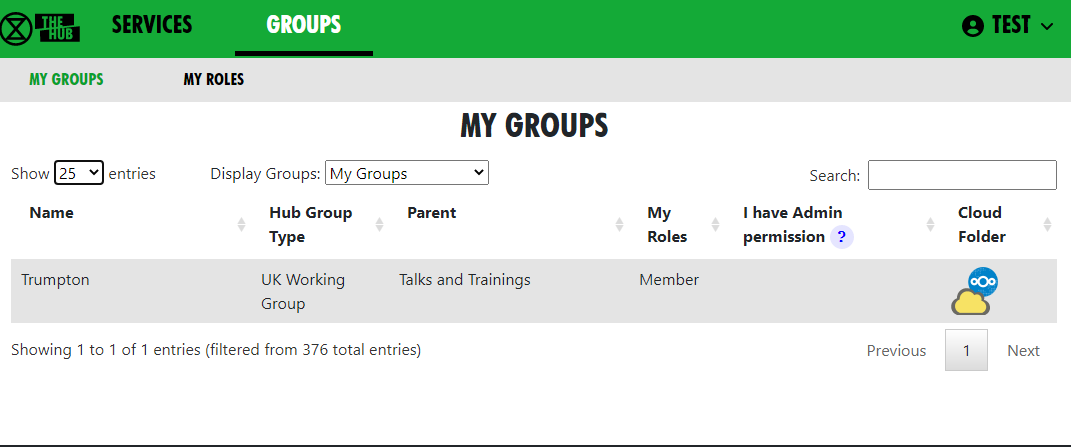
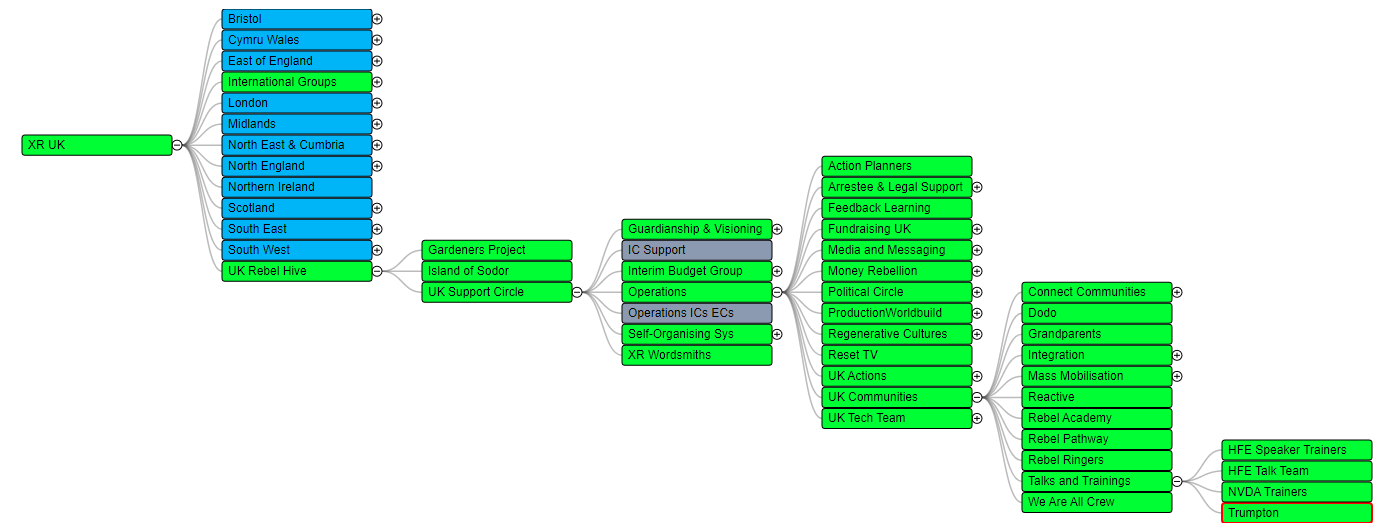
This brings up a list of Groups you are in. Click on ALL GROUPS at the top to see all the groups, even the ones you are not in. Click on a group to show the group in context.
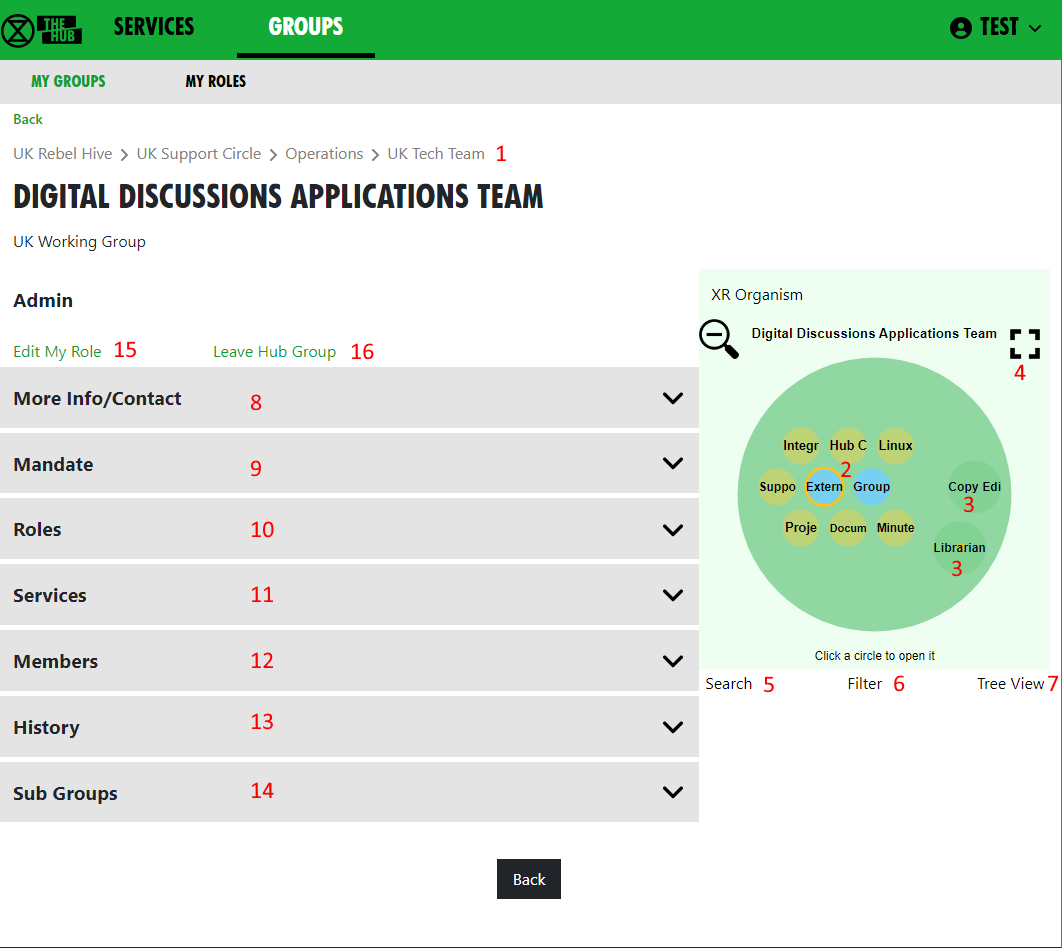
This screen is showing the Digital Discussions Applications Team UK Working Group. It also shows the parent groups (1) – click on one to go to it.
The Hub Circles display shows the group's Roles (2), and any child groups (3). This has a full-screen button to make it larger and easier to navigate (4). To find your way about the structure, you can click on any group to go to it, or on the background to go up a level.
If you want to find another group, you can use the search button (5).
You can click the Filter button (6) to hide some of the detail, to make the diagram less busy. If you set a filter, it is remembered and used every time you open this view.
You can also display the groups in a Tree View (7) instead of the Circles Display.
Click any of the grey bars on the left to reveal more information:
- More Info/Contact (8) shows info about the group, links to social media, group email address, etc.
- Mandate or Scope (9) Mandate shows the group's Mandate within the XR SOS structure. Scope is for groups that don't follow the SOS constitution.
- Roles or Positions (10) shows the specific roles within the group, and who holds them. Click on a person's name to send them a direct message via Mattermost.
- Services (11) shows all the group's Mattermost Teams and Channels, Forums and Cloud space. Those you have permission to join are shown as clickable links.
- Members (12) only appears if you are a member of the group, and shows a list of all the other members.
- History (13) only appears if you are a member of the group, and shows you any changes that have been made to the group or roles within it.
- Sub Groups (14) shows any subcircles/subgroups
- Admin only appears if you are a member of the group, and contains links to allow you edit your role(s) (15) in the group, or leave the group (16). Group Admins will have more options here, e.g. to invite other people, and create or edit Channels, Forums and group information.
Secret Codeword
Click this icon to set a unique secret codeword to identify you. Then, if you want to communicate with XR (e.g. Arrestee Support) without revealing who you are to anyone listening, you can use the codeword. They can look it up on the Hub, and know who you are.
Only Arrestee Support, Hub Admins, and your Group Admins can see your codeword.
If you want to change your code word later, it is in Settings – click your name in the top-right corner to see the menu.