Creating your event: Order Confirmation and Order From
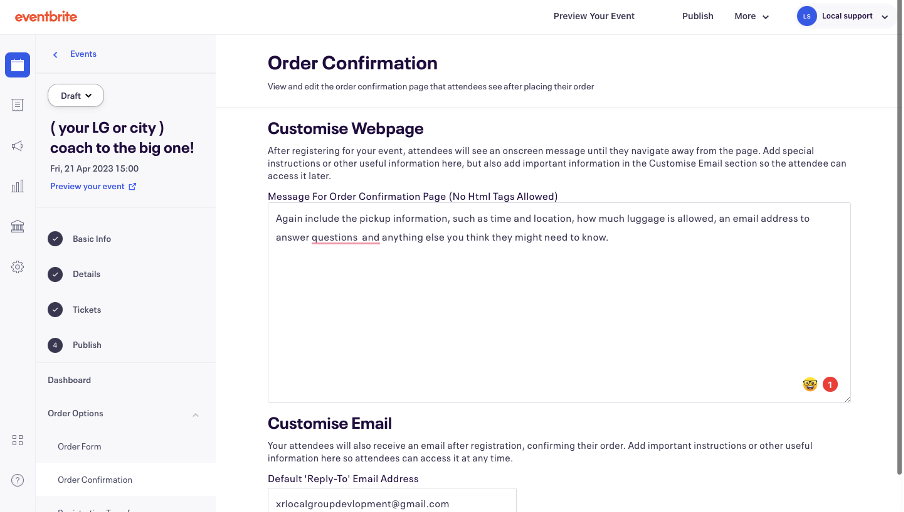
Once someone buys a ticket, they will be shown an order confirmation page. It’s helpful to include some basic information, including event accessibility, timings, and an email so people can ask questions.
You should then also put this information on the email confirmation that people will receive.
To edit this page, on your event dashboard go to the left bar and click ‘Order Options’ and then click ‘Order Confirmation’. Then you can add details to the the confirmation webpage and the email confirmation in the boxes below. Make sure to use the XR email you used for the account and public enquiries, in the 'Default 'Reply-To' Email Address' box.
Once you have added the text you want, click ‘Save’ at the bottom right-hand of the screen.
Order form
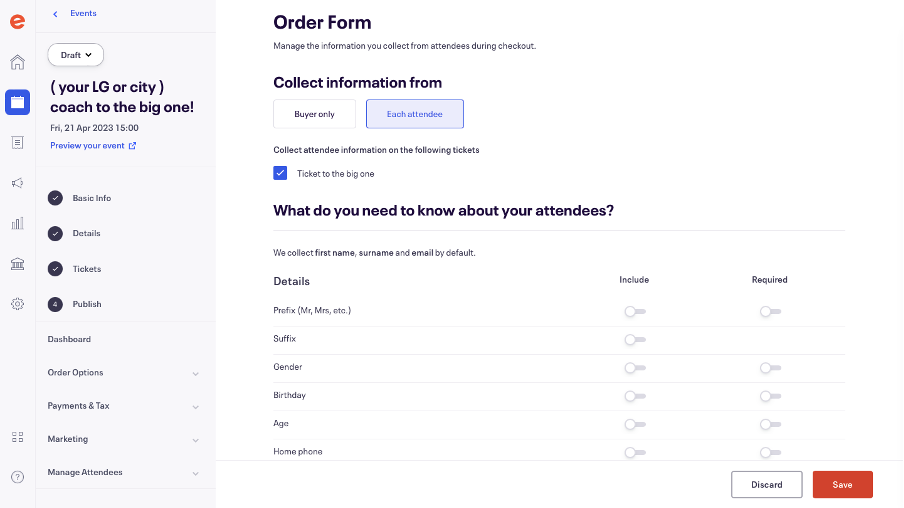
You can choose to ask more questions during the order, such as phone numbers. Eventbrite automatically collects full names, and email addresses, this can not be turned off. We recommend keeping the settings standard as you are unlikely to need to collect more than names and emails: do not collect more data than you need to. However, you may want to change the settings so it collects information on each attendee, as if a rebel books two tickets, then you only have the information for that one rebel. By collecting for each attendee you can easily track attendees on the day of the event. This will also mean you can email important updates to all attendees and not just to the person who made the booking.
To change this setting, you need to click ‘Order Options’ on the left hand side bar, then click ‘Order Form’. Then under “Collect information from’ click ‘Each attendee’ and then click 'Save' on the bottom right.