
Creating a form
Forms are for collecting extra information or feedback from your list. E.g
- asking people if they are interested in certain ongoing activities like 'arts', 'action planning', 'social media support'.
- a general shout out for people with any time to spare (giving some options)
- registering their interest in distributing leaflets (you might collect their phone number so you could contact)
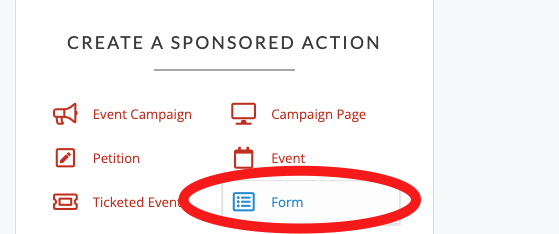
To start a new form - start here
From the Create a sponsored action menu on the right hand side, choose Form
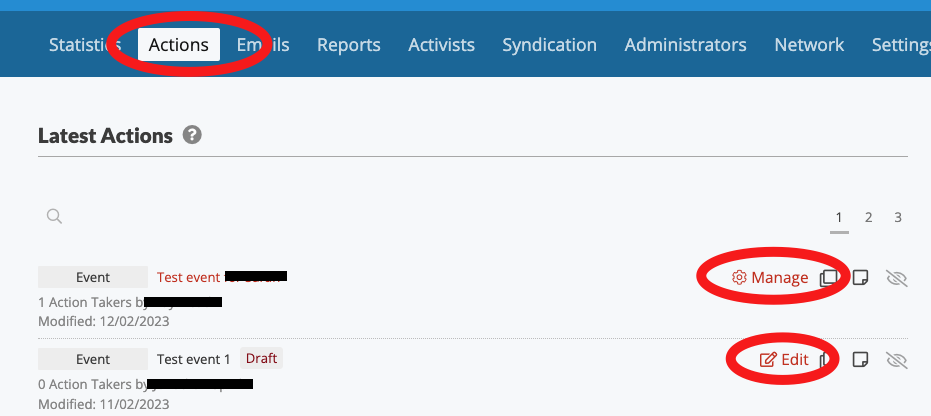
To edit a current form - start here
Click on Actions then either Manage for a published form OR Edit for a form still in draft. Follow the same instructions below, but obviously some things may have already been set up.
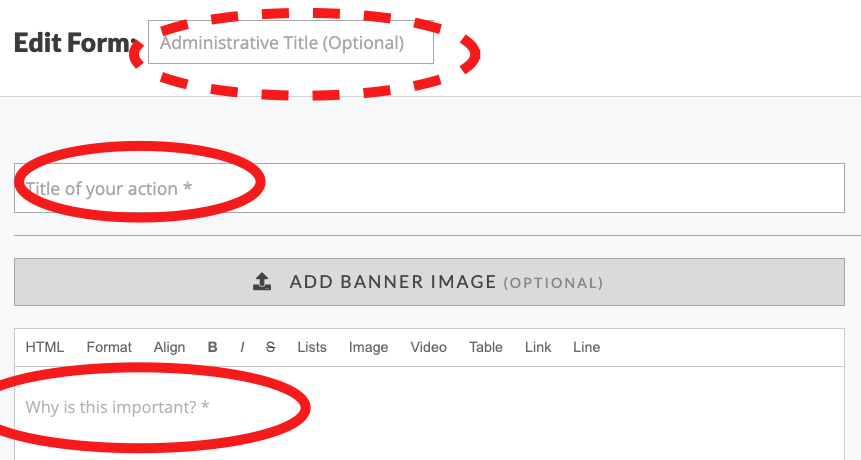
1. Title and description
Give your form a short and clear title (and optionally a more descriptive different title for internal use only) and also a description/instructions written clearly for the person you want to fill in the form.
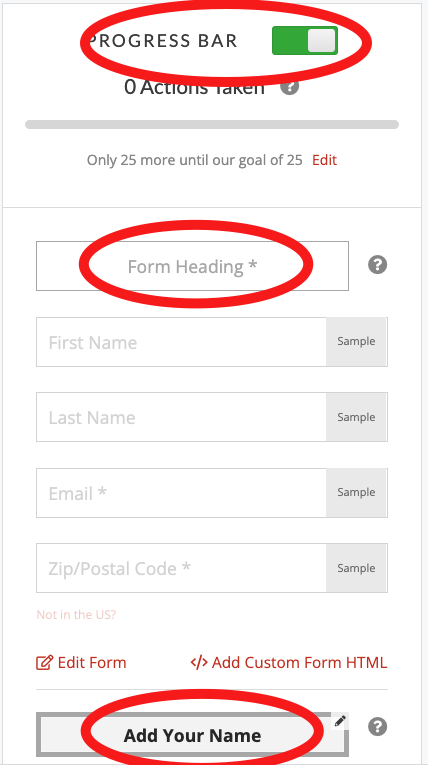
2. More settings
You can let people know how many other people have taken the action of filling out the form by leaving the Progress Bar on, but usually this is turned off. Then you need a short Form Heading and at the is you can update the text that appears on the submit button depending on what kind of form this is. This could be e.g. 'Update', 'Submit Info' or 'Register'.
3. Edit Form
Then click Edit Form (as seen just above), which takes you to a drag and drop type page to add or remove questions from your form.
This part is hard to describe in words and images - so you need to just have a go. You can drag and drop any fields you don't want for your event (it's up to you). Just click on them and drag away from the left and let go.
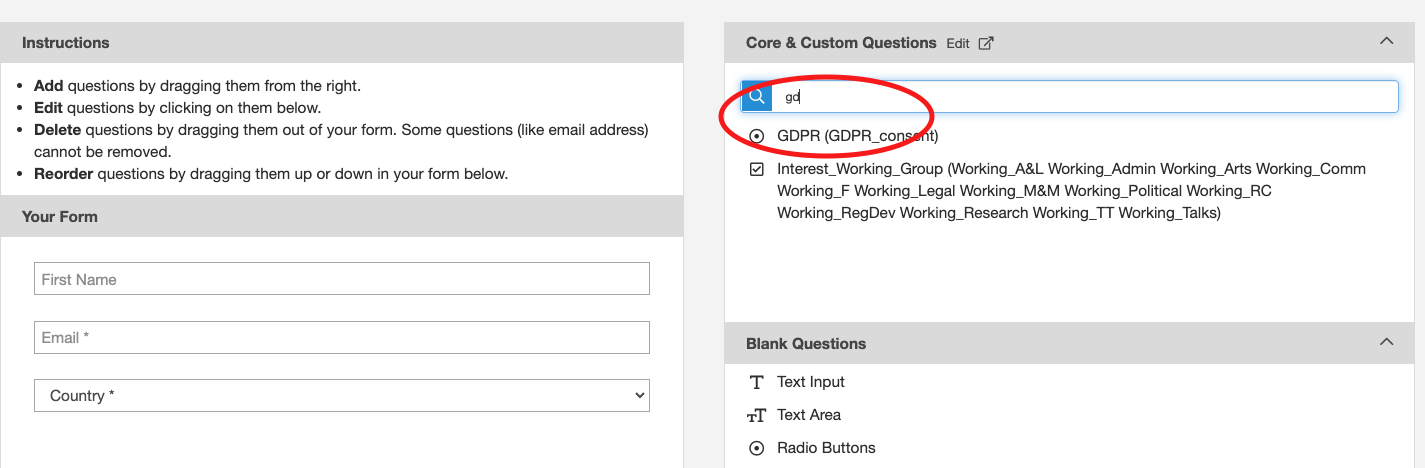
In this example the surname and postcode have been removed and the GDPR field is being picked up and moved in to the form.
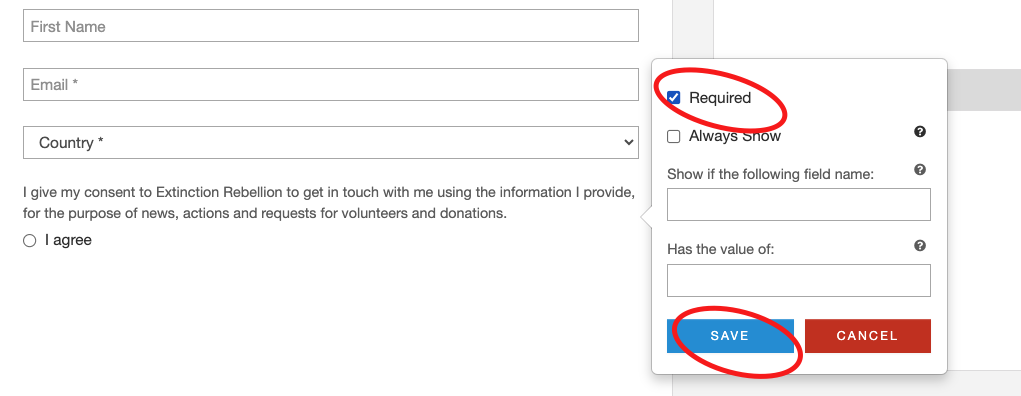
The fields can then be set to 'Required' if they are mandatory.
The GDPR consent field should always be set to 'Required'.
NOTE: Historically all admins could create questions and we've ended up with hundreds of questions with lots of overlap. So we are documenting a list of some standard XRUK questions that you can use.
You could also add your own questions at this stage, but note that the information will only be stored within the form answers, not with their activist record. It might be worth requesting some training from the Action Network Data Team to explain how all this works in more depth.
In the bottom right click 'SAVE AND PREVIEW' and 'SAVE AND GO TO NEXT STEP'.
4. Thank You page
To keep things simple - turn off the sharing options (you can investigate this later), and change the title to something that suits your form.

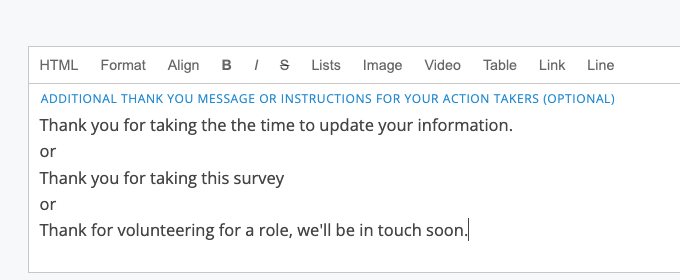
5. Write a short message
6. Click 'Save and Publish'
You form is now live, some last things to do are:
- add a nice page wrapper
- The page wrapper gives your Event the 'XR Style' of font and colours and also this gets rid of all the Action Network branding at the top and bottom of the page. Swap from the default to the 'no logo' one.
- turn off or set up auto-reply emails (see next page)
- Click on 'Responses'
- As usual for an email - you might pick an appropriate wrapper (contact data team if you don't have the XR Wrappers), set up your subject, from and reply-to email correctly.
- Click SAVE RESPONSES
7. Promote
Lear more about advertising your event in regards to URLs, preview images and tracking where sign ups have come from.
If you need help with setting up a Form, please book a training or coaching session via our Training Request Form, or contact the Action Network Data Team.